Our second Building Beauty studio project involved building a piece of furniture for our home. A needed piece of furniture, with an emphasis on feeling. Another way it was framed for us: a piece of furniture you’d want to keep for the rest of your life.
1. Identifying the Place
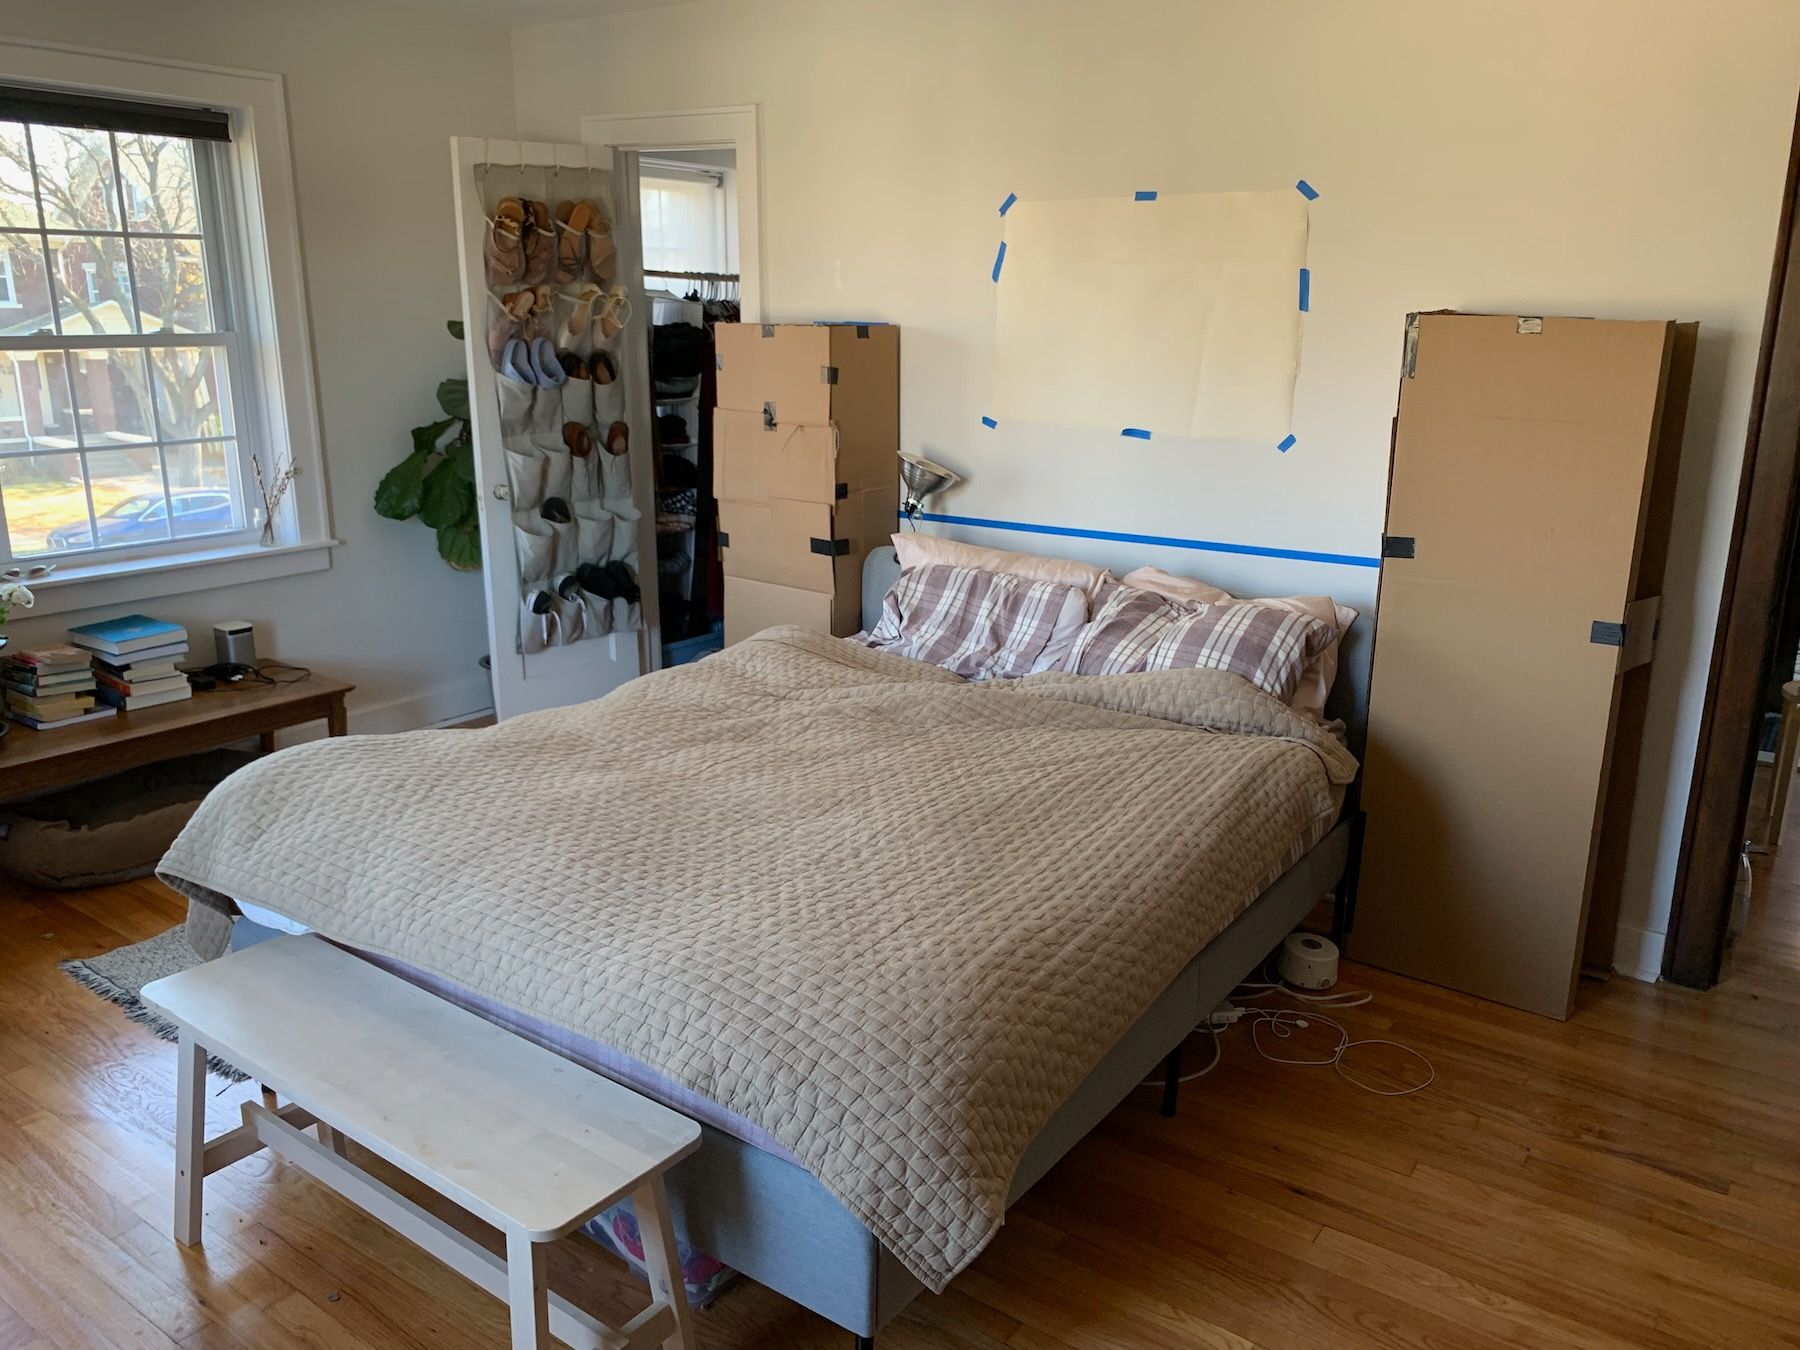
Like with the Ornament project, I started by identifying the places in my house that needed repair or healing. One of those places was our bedroom.
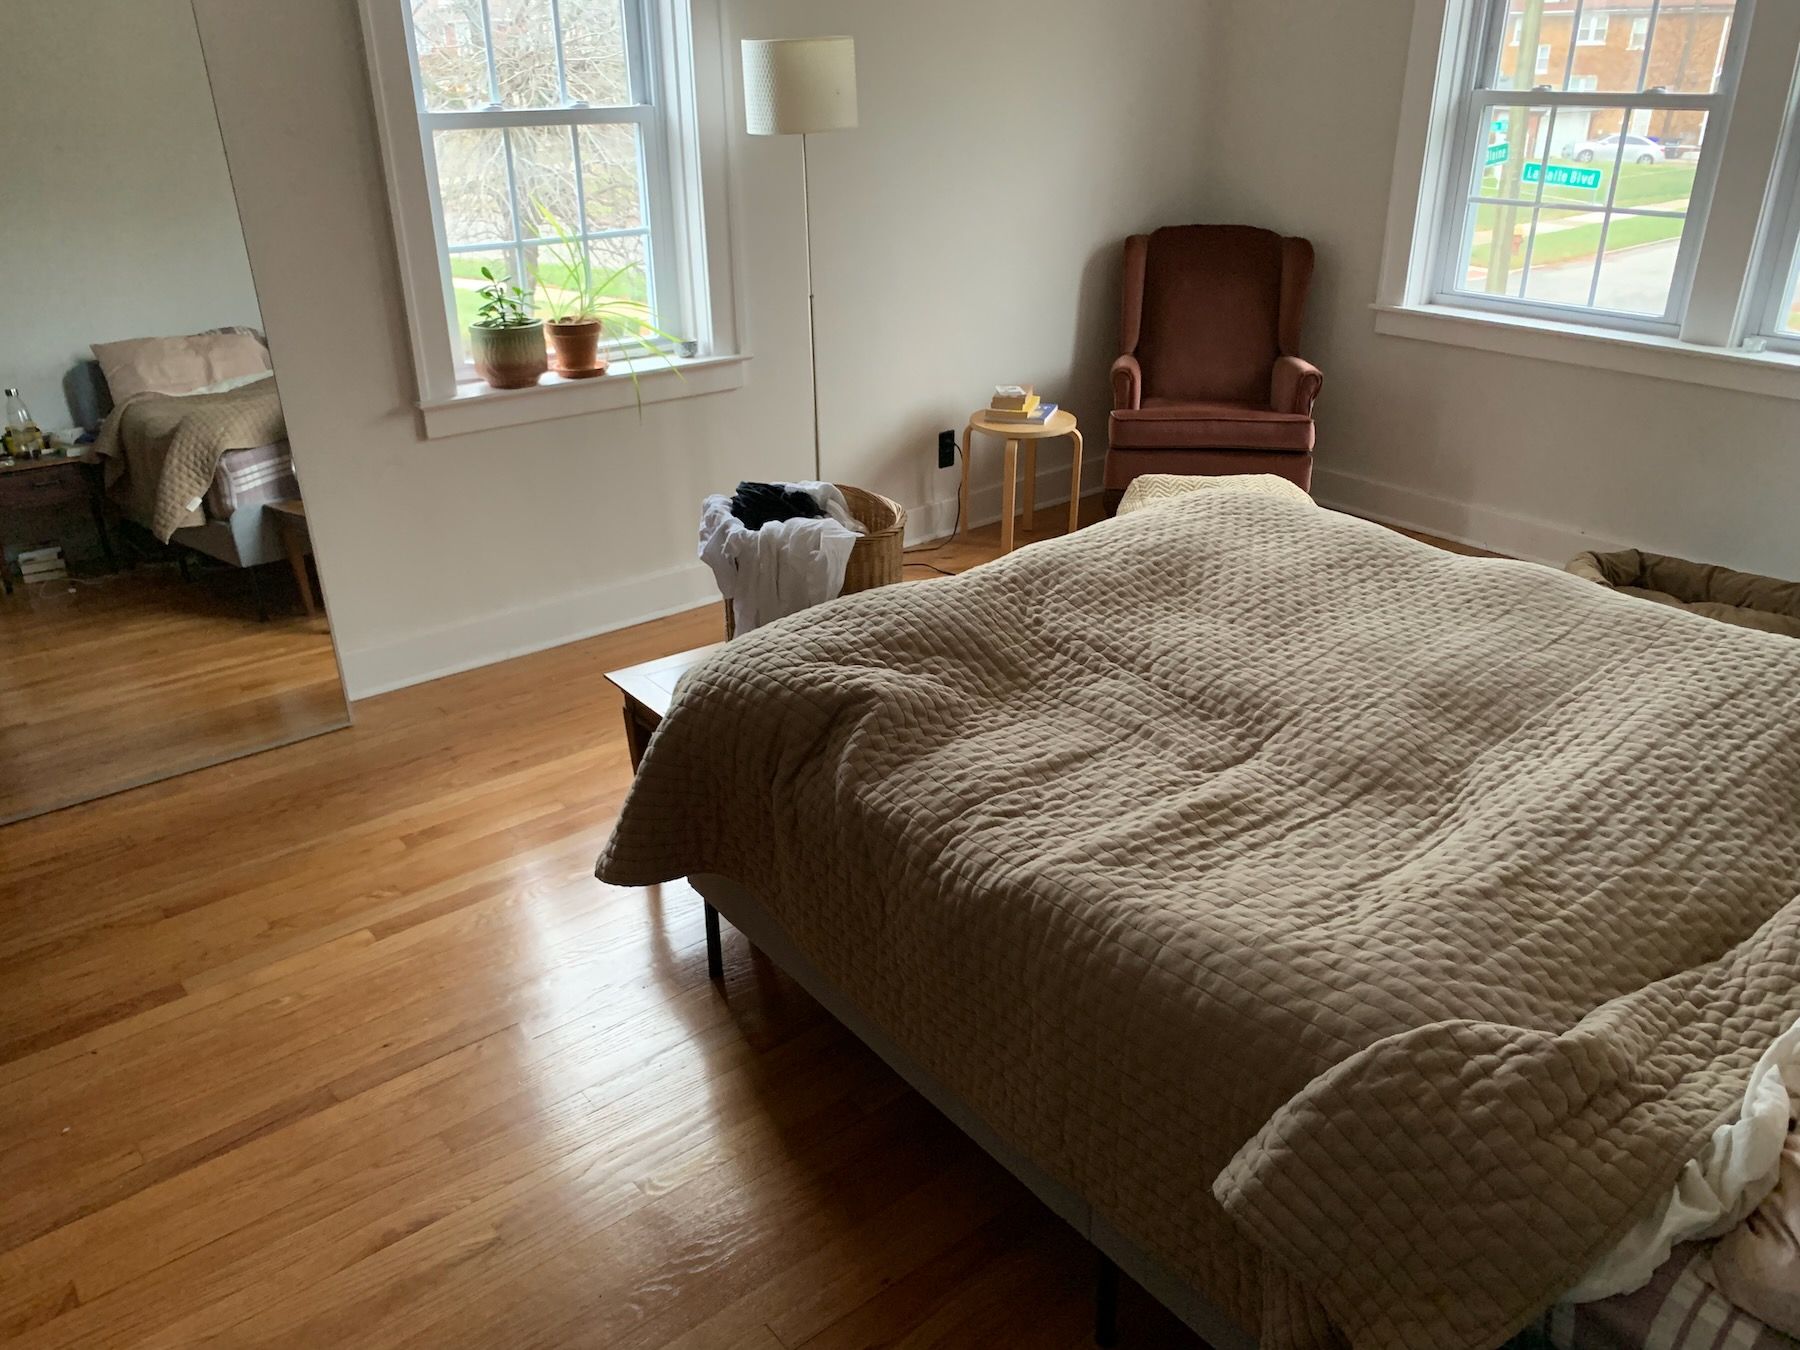
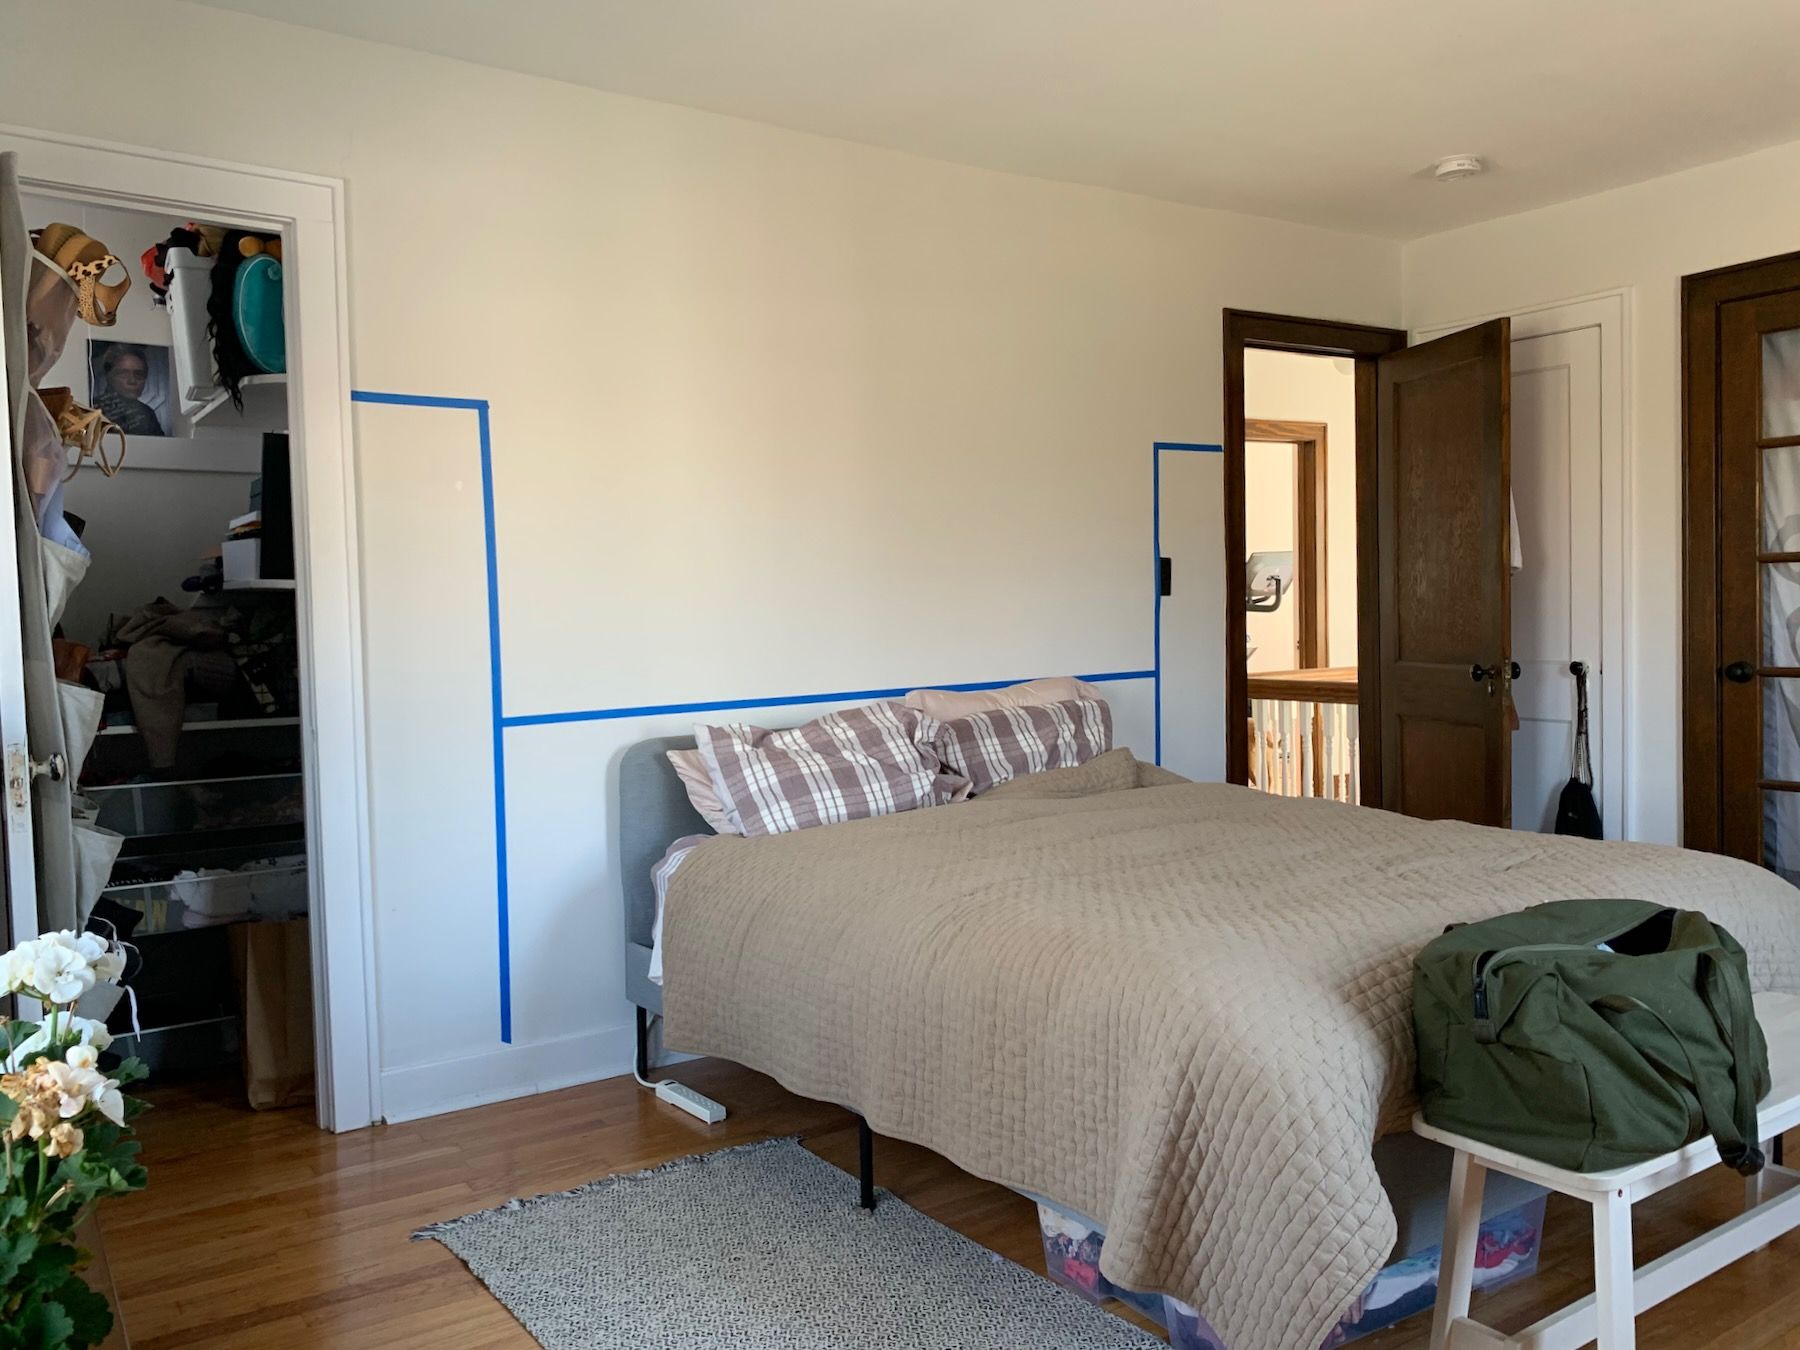
At the foot of our bed is an old bench/coffee table. It’s big.
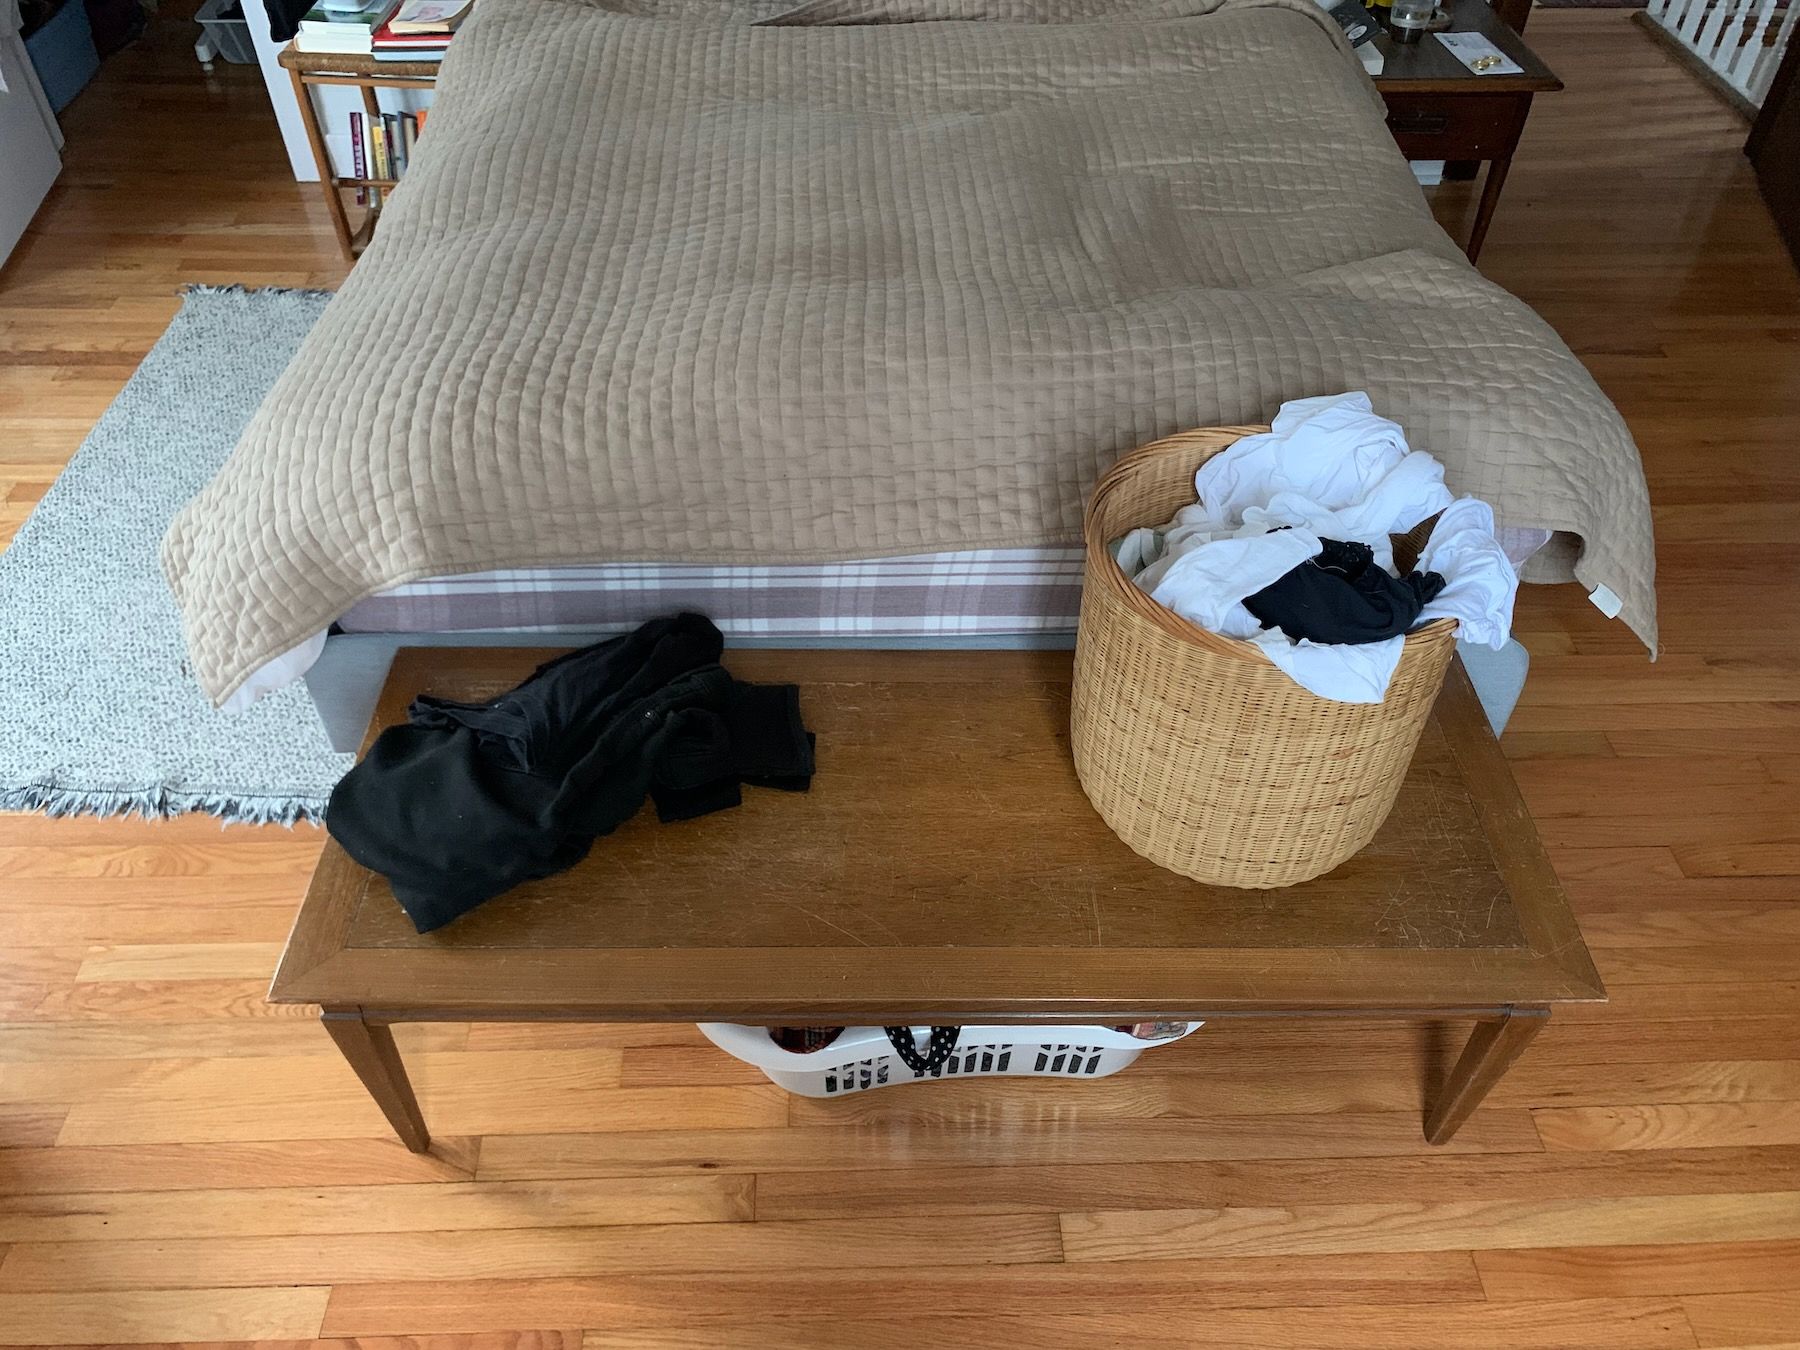
So big that I regularly hit my shin on its corners on bathroom trips in the middle of the night. The bench’s size also makes it a magnet for clothes, from those to be worn again to dirty laundry to clean-but-yet-to-be-folded laundry. I thought it’d be nice to have a better-fitted bench here, maybe with some storage. At the very least something that doesn’t cause me physical injury.

2. Sketches
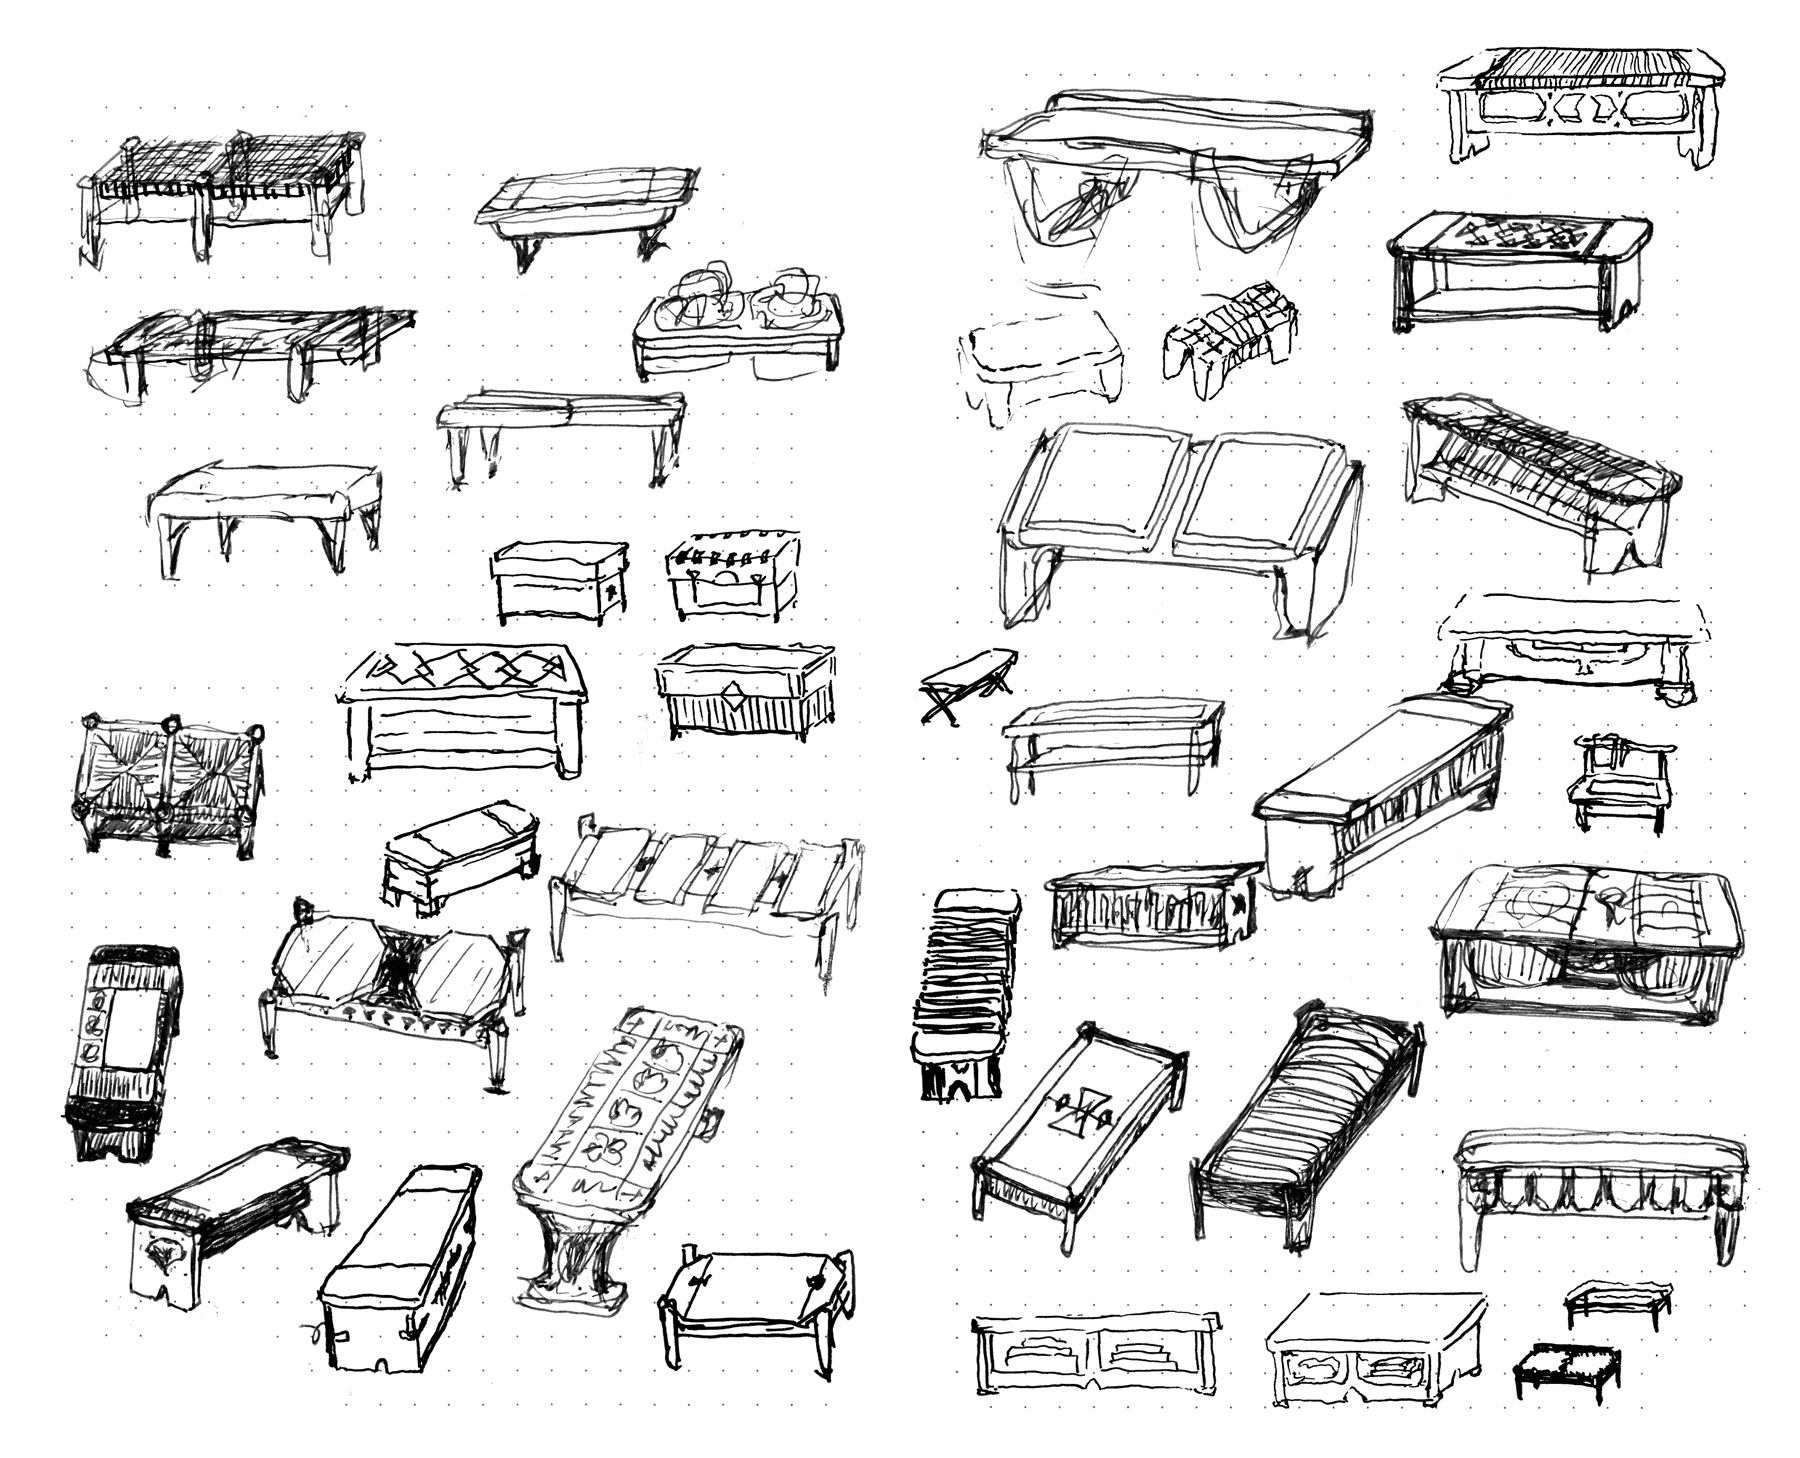
There were definitely some sketches here that had the feeling I was going for, particularly the one with the gingko-leaf ornament in the bottom left and the one immediately to the right of it. But reviewing in class, my instructors encouraged me to ask if a bench was what the room really needed. Would it make make the space more coherent, more – to use the language of the class – whole?
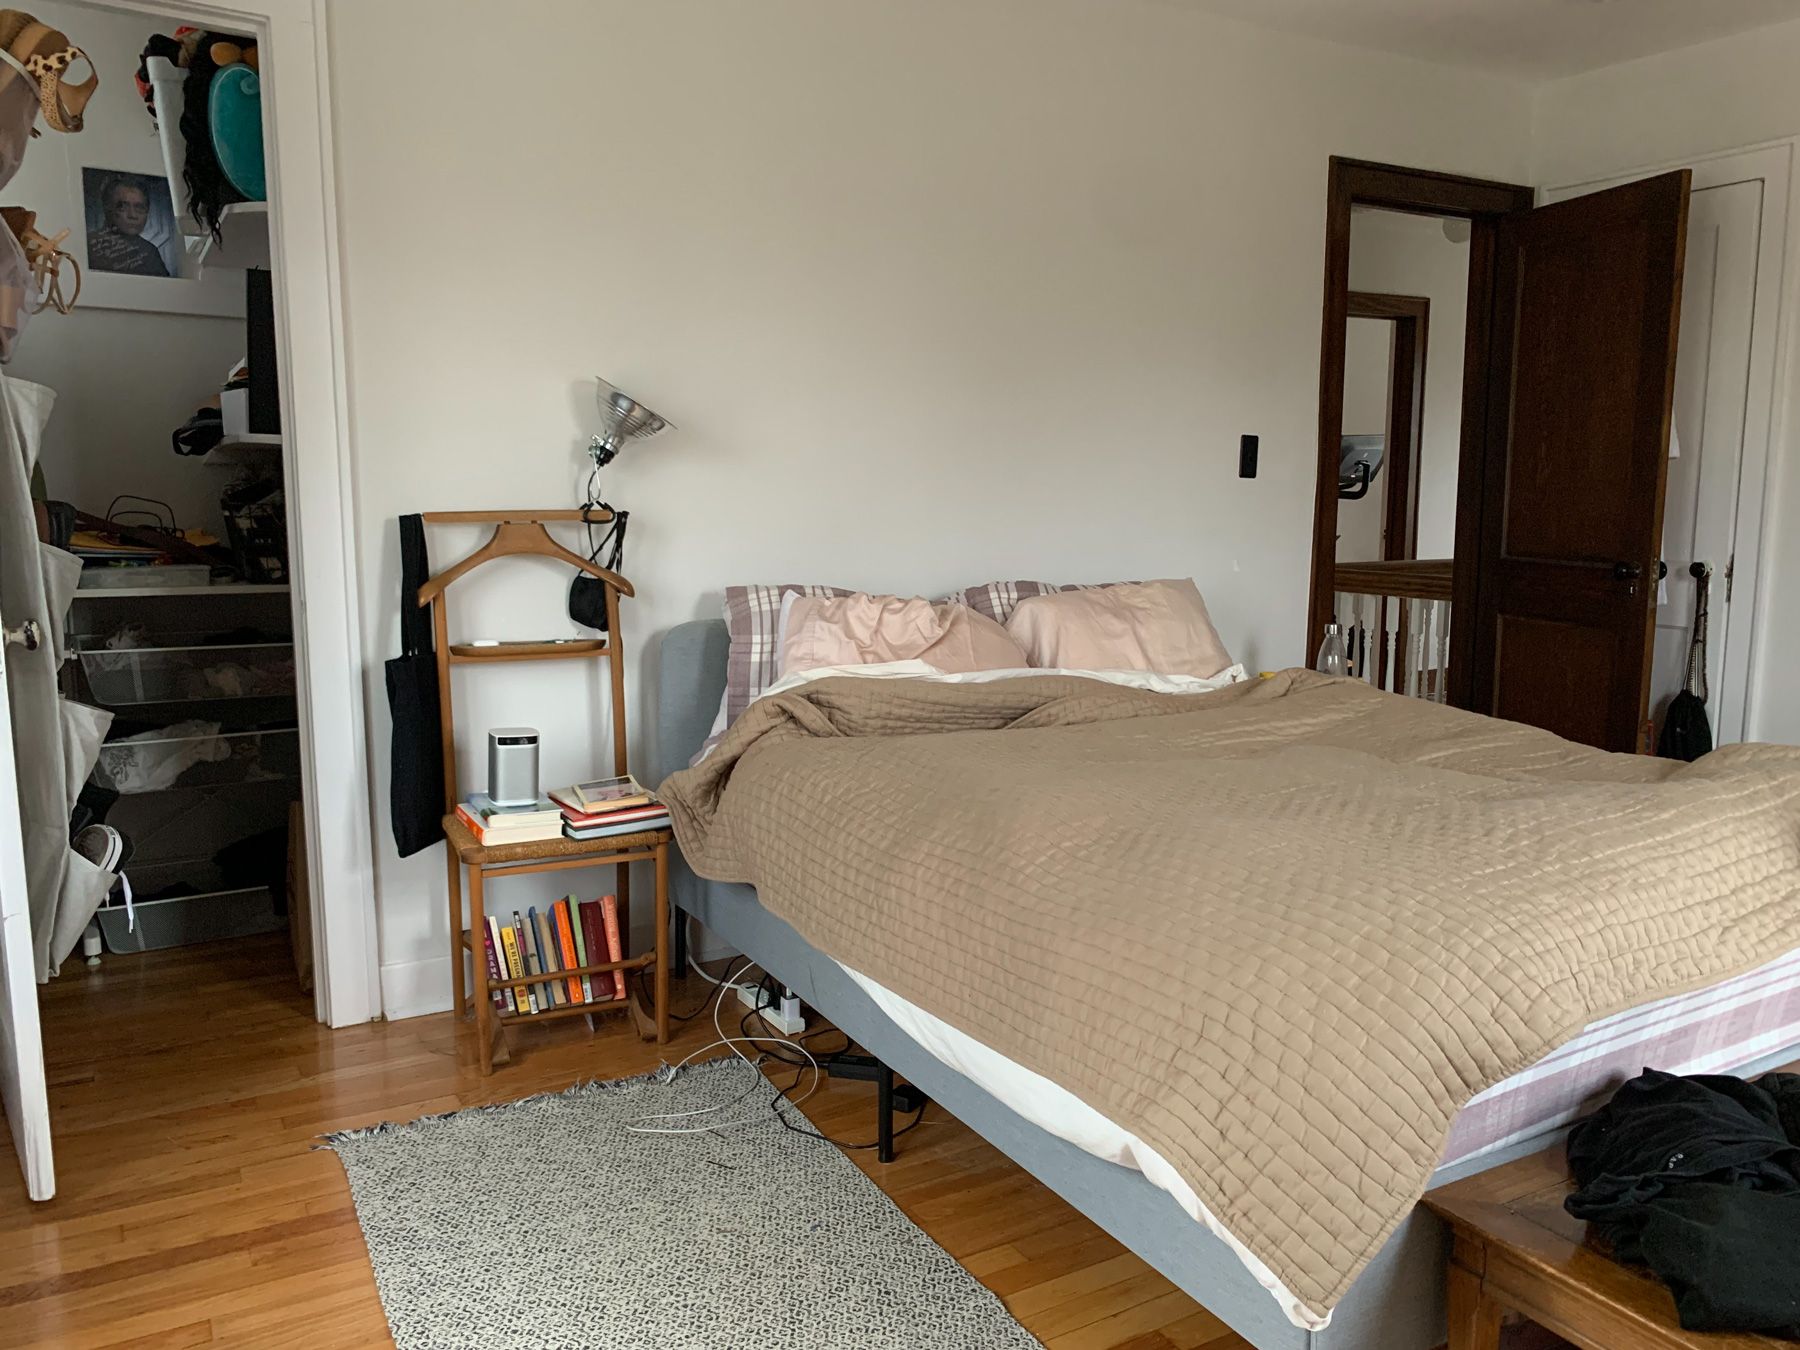
The answer was a clear no. My instinct to work on this room was good; but instead of the foot of the bed I needed to work more on the head of it. The bed’s the main center of the room, and what we have behind and to the sides of it do little to reinforce its primacy. That’s where I could make the biggest impact.
Pattern #187 of Christopher Alexander’s A Pattern Language is titled “Marriage Bed.” In it, Alexander talks about this primacy, citing the bed that Odysseus builds for Penelope, by which he identifies himself to her upon arriving home after his long journey:
There was a strong young olive tree in full leaf growing in an enclosure, the trunk as thick as a pillar. Round this I built our bridal chamber; I did the whole thing myself, laid the stones and built a good roof over it, jointed the doors and fitted them in their places. After that I cut off the branches and trimmed the trunk from the root up, smoothed it carefully with the adze and made it straight to the line. This tree I made the bedpost. That was the beginning of my bed; I bored holes through it, and fitted the other posts around it, and inlaid the framework with gold and silver and ivory, and I ran through it leather straps coloured purple.
Practically, the pattern suggests that the bed have some kind of enclosure, on the sides or with a low canopy; have the room shaped around it; have the bed itself shaped, with a headboard that could be carved or painted over the years.
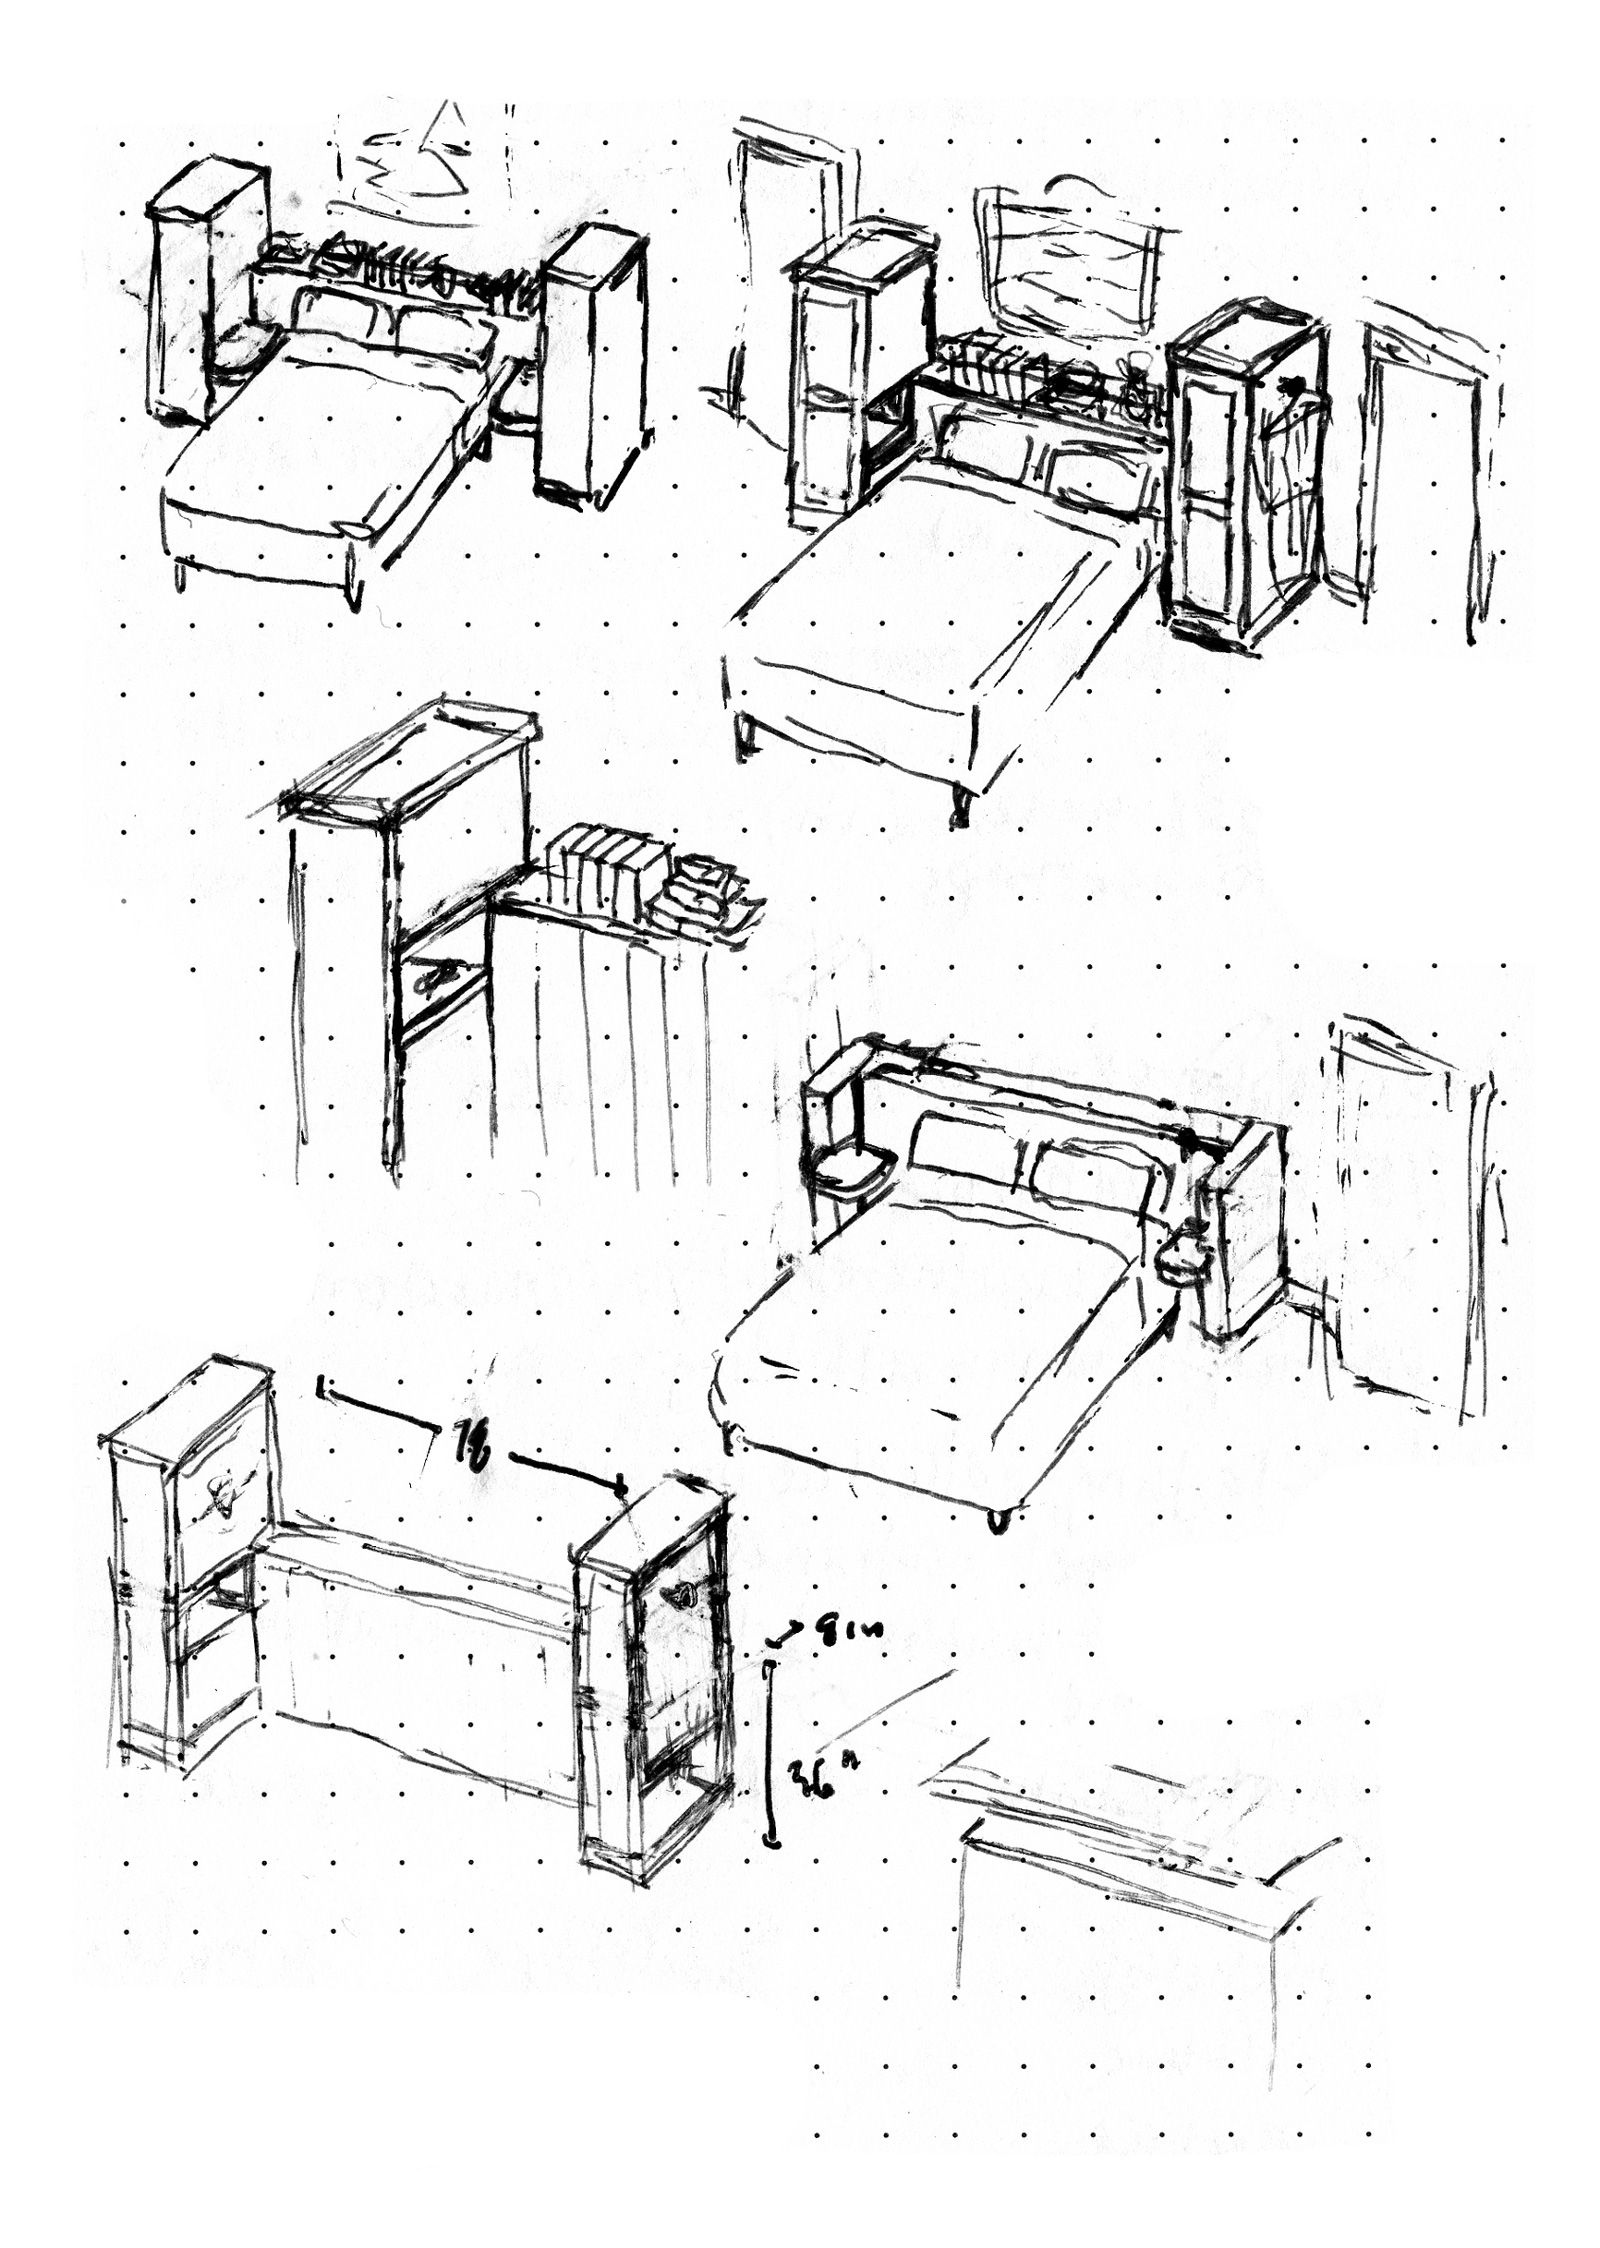
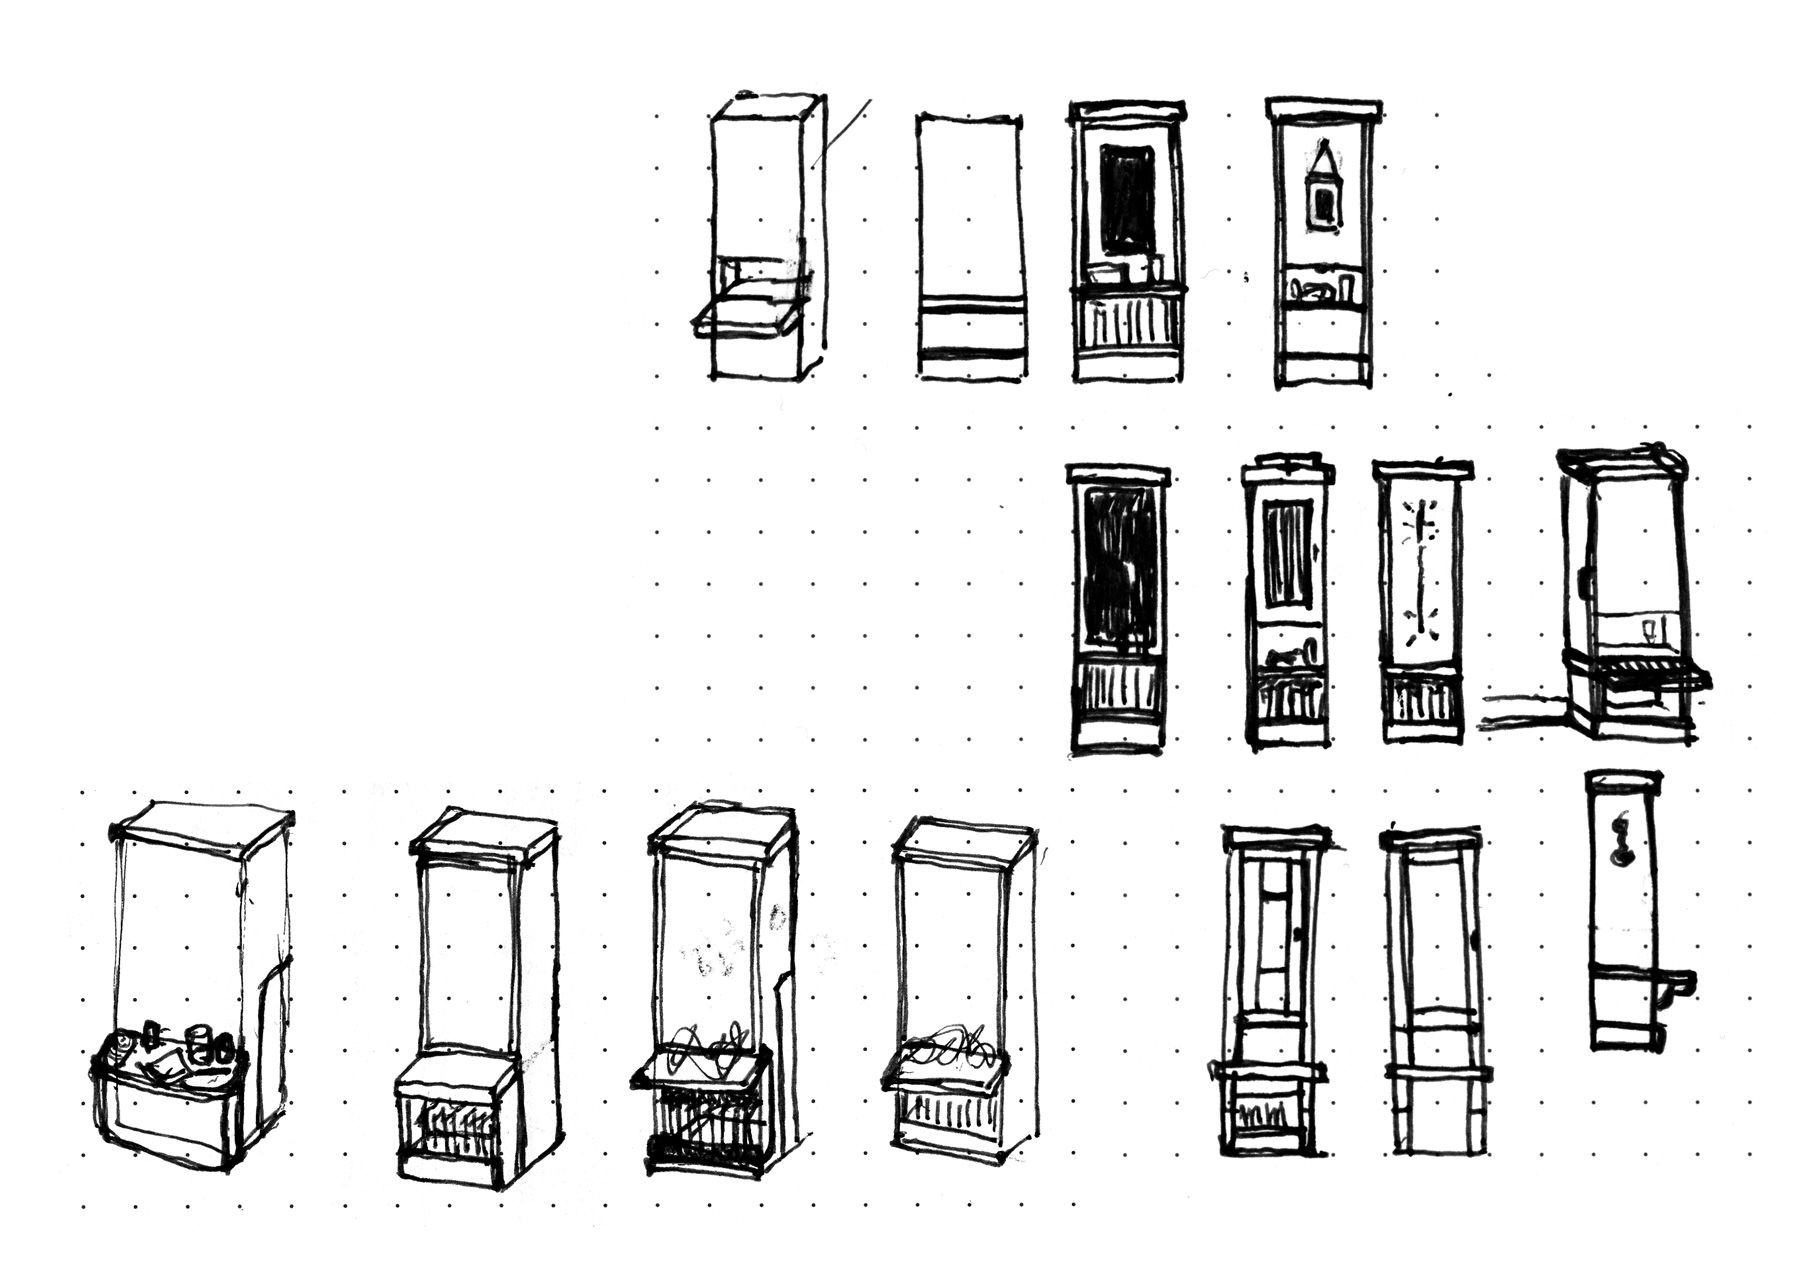
I went back to the sketchbook.
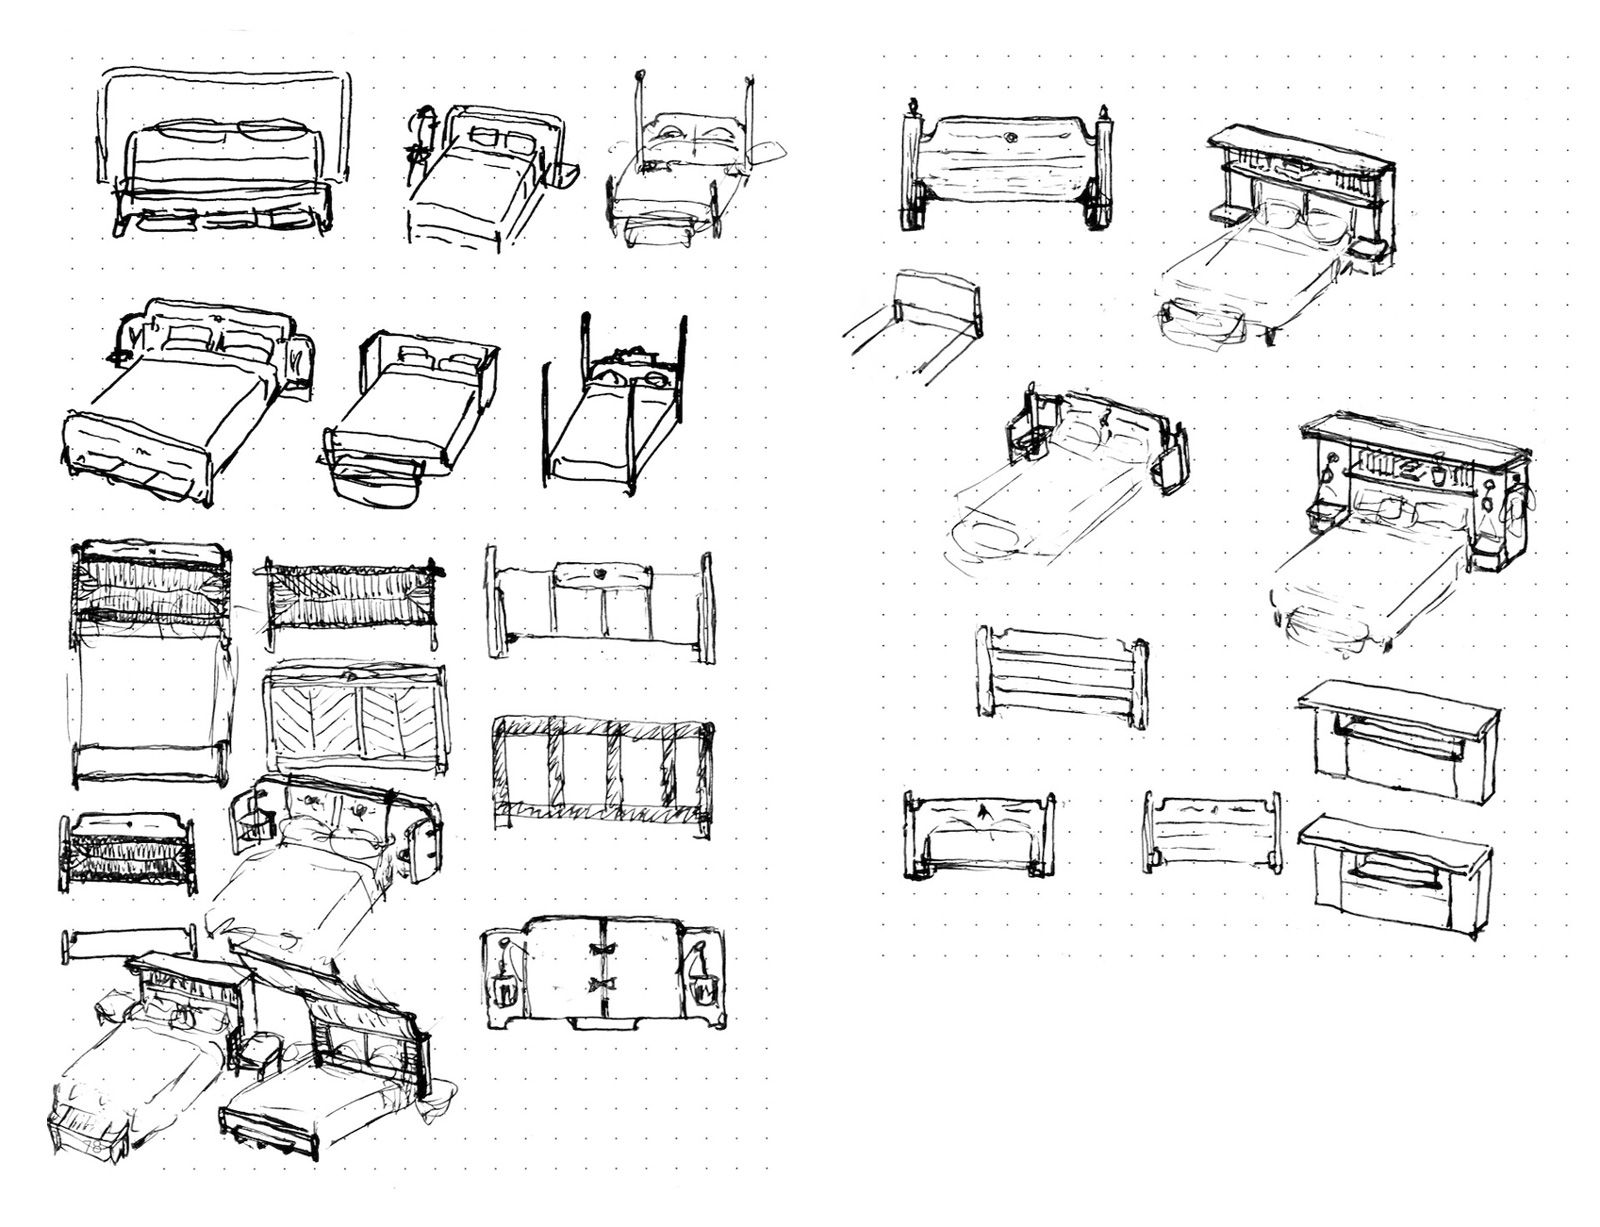
And settled on a design to model.
3. Models and Mockups
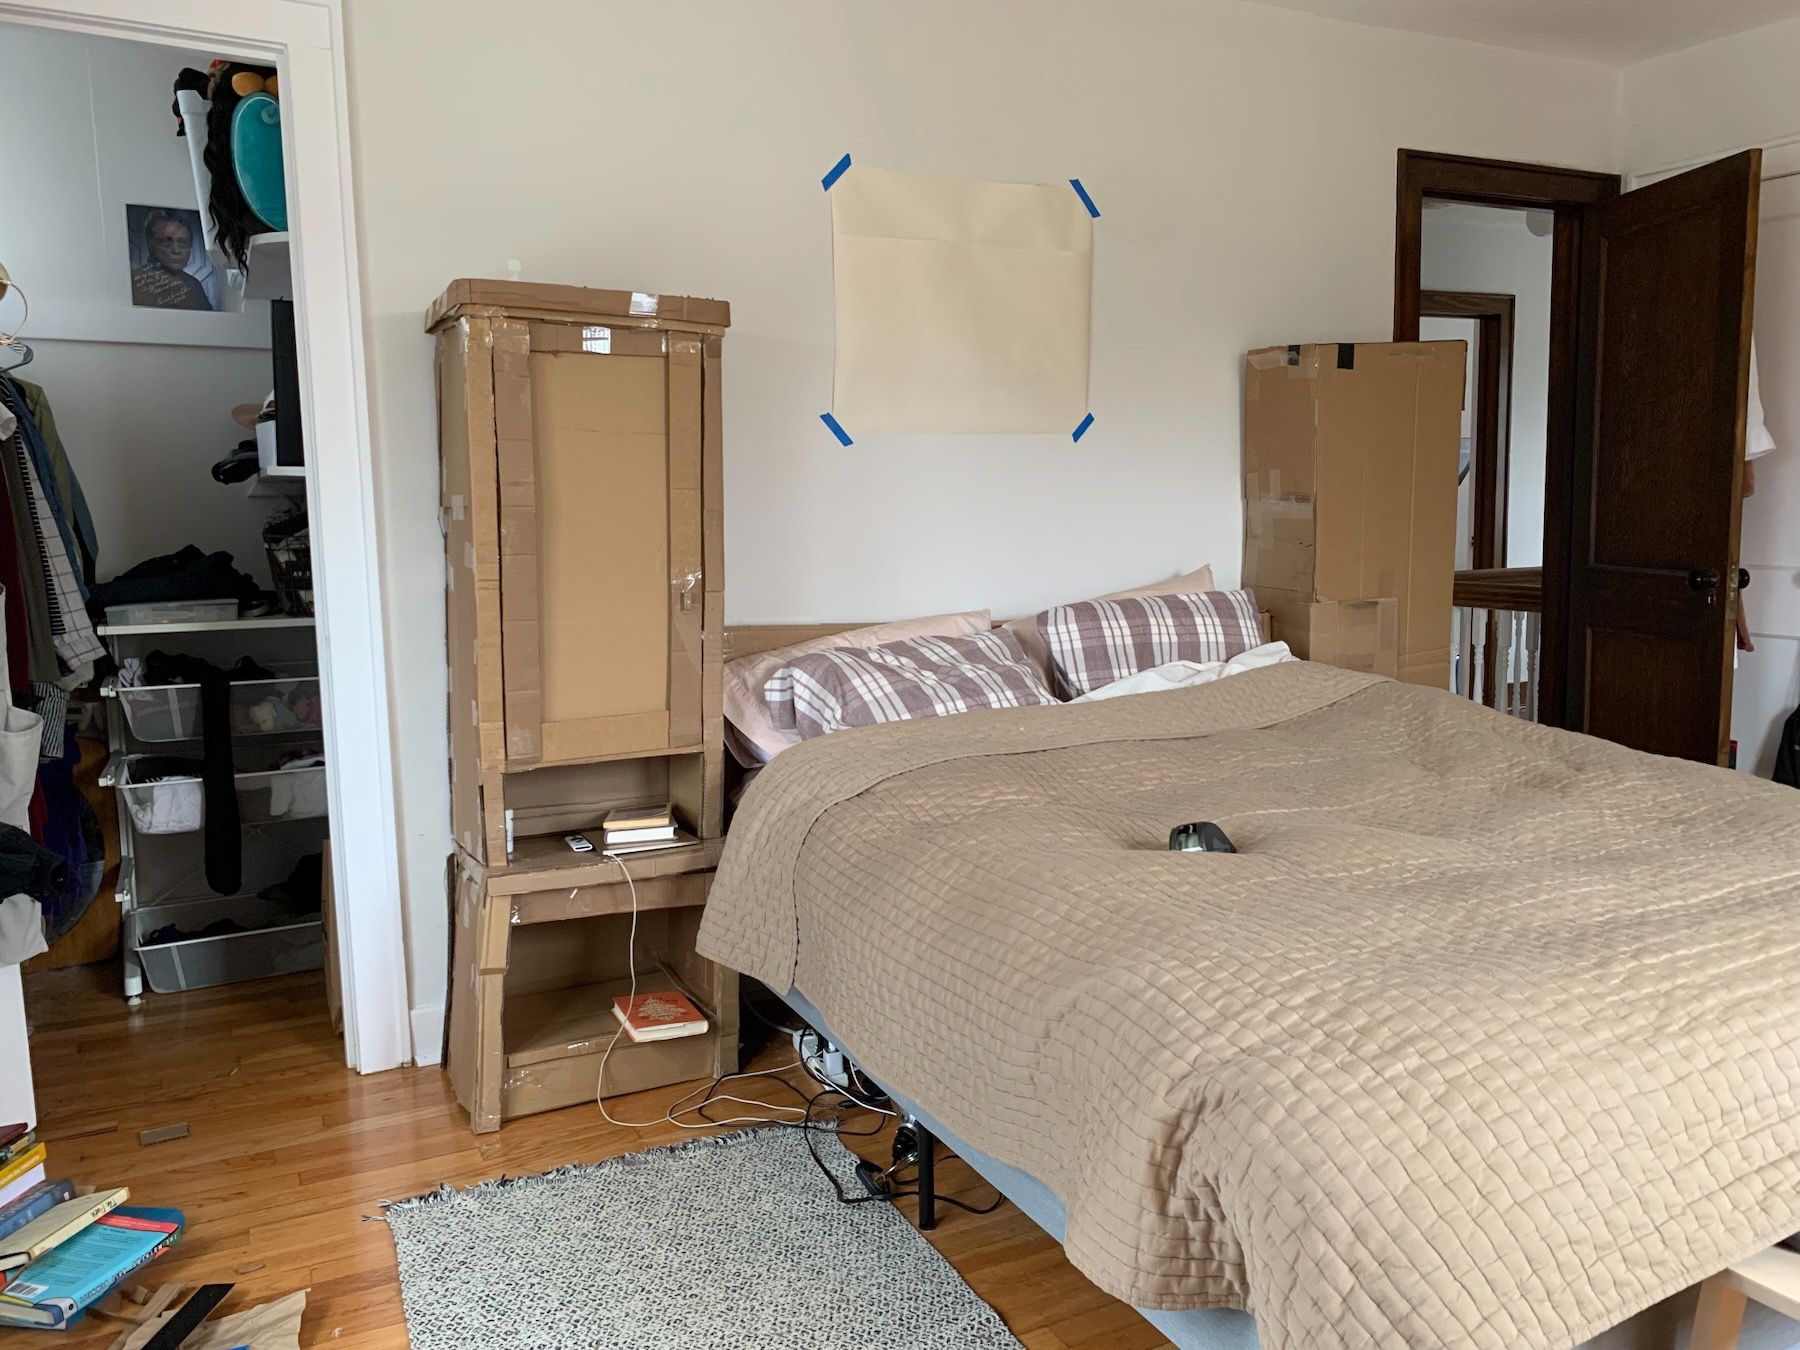
From here I built 1/4":1' (roughly 1:40) scale models out of cardboard and manilla folder stock. Julia and I had also been wondering if we should upgrade to a king size bed, so I included that in the model below, along with the wall behind the bed to get a sense of fit.
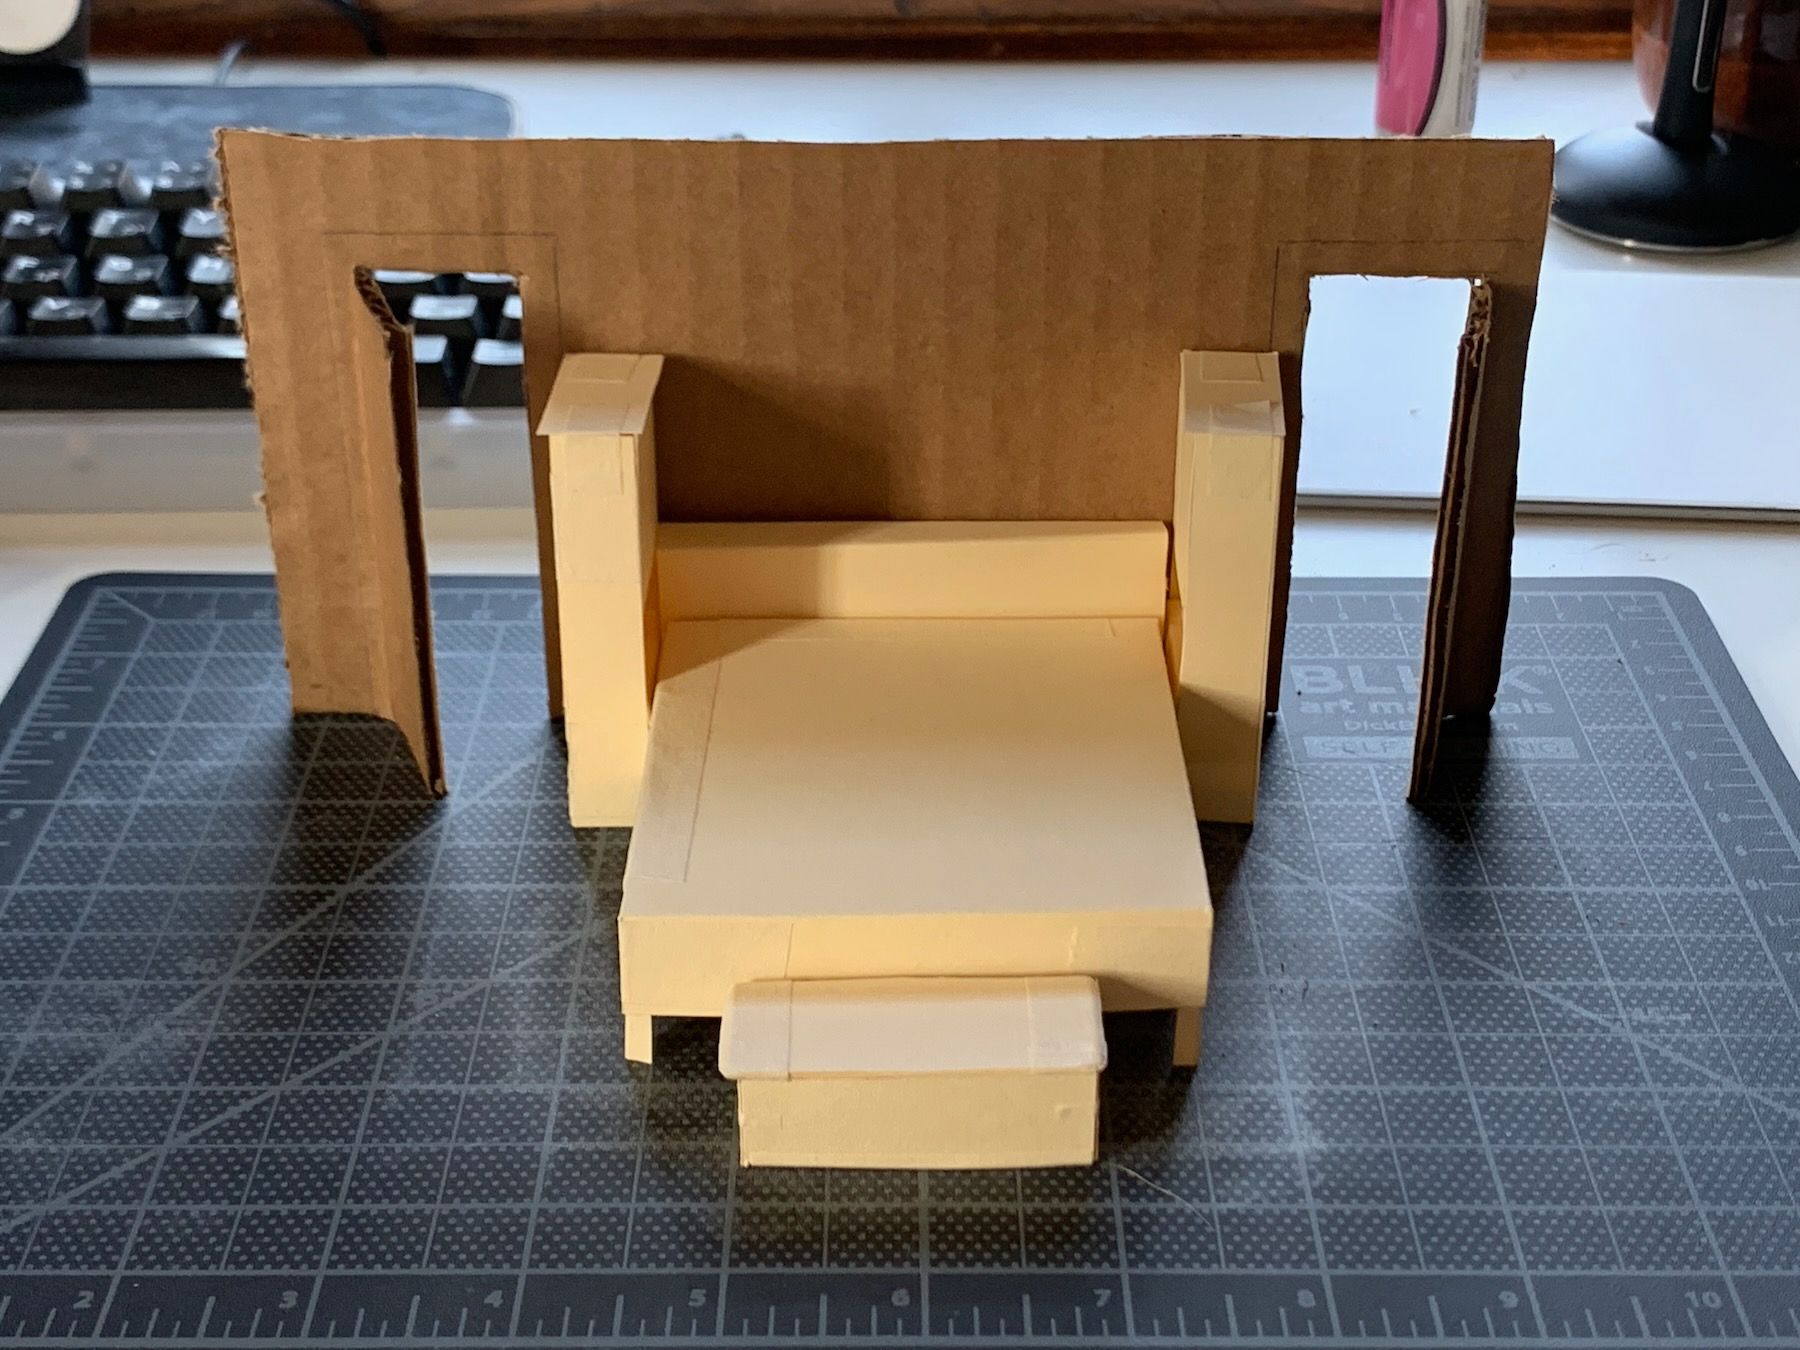
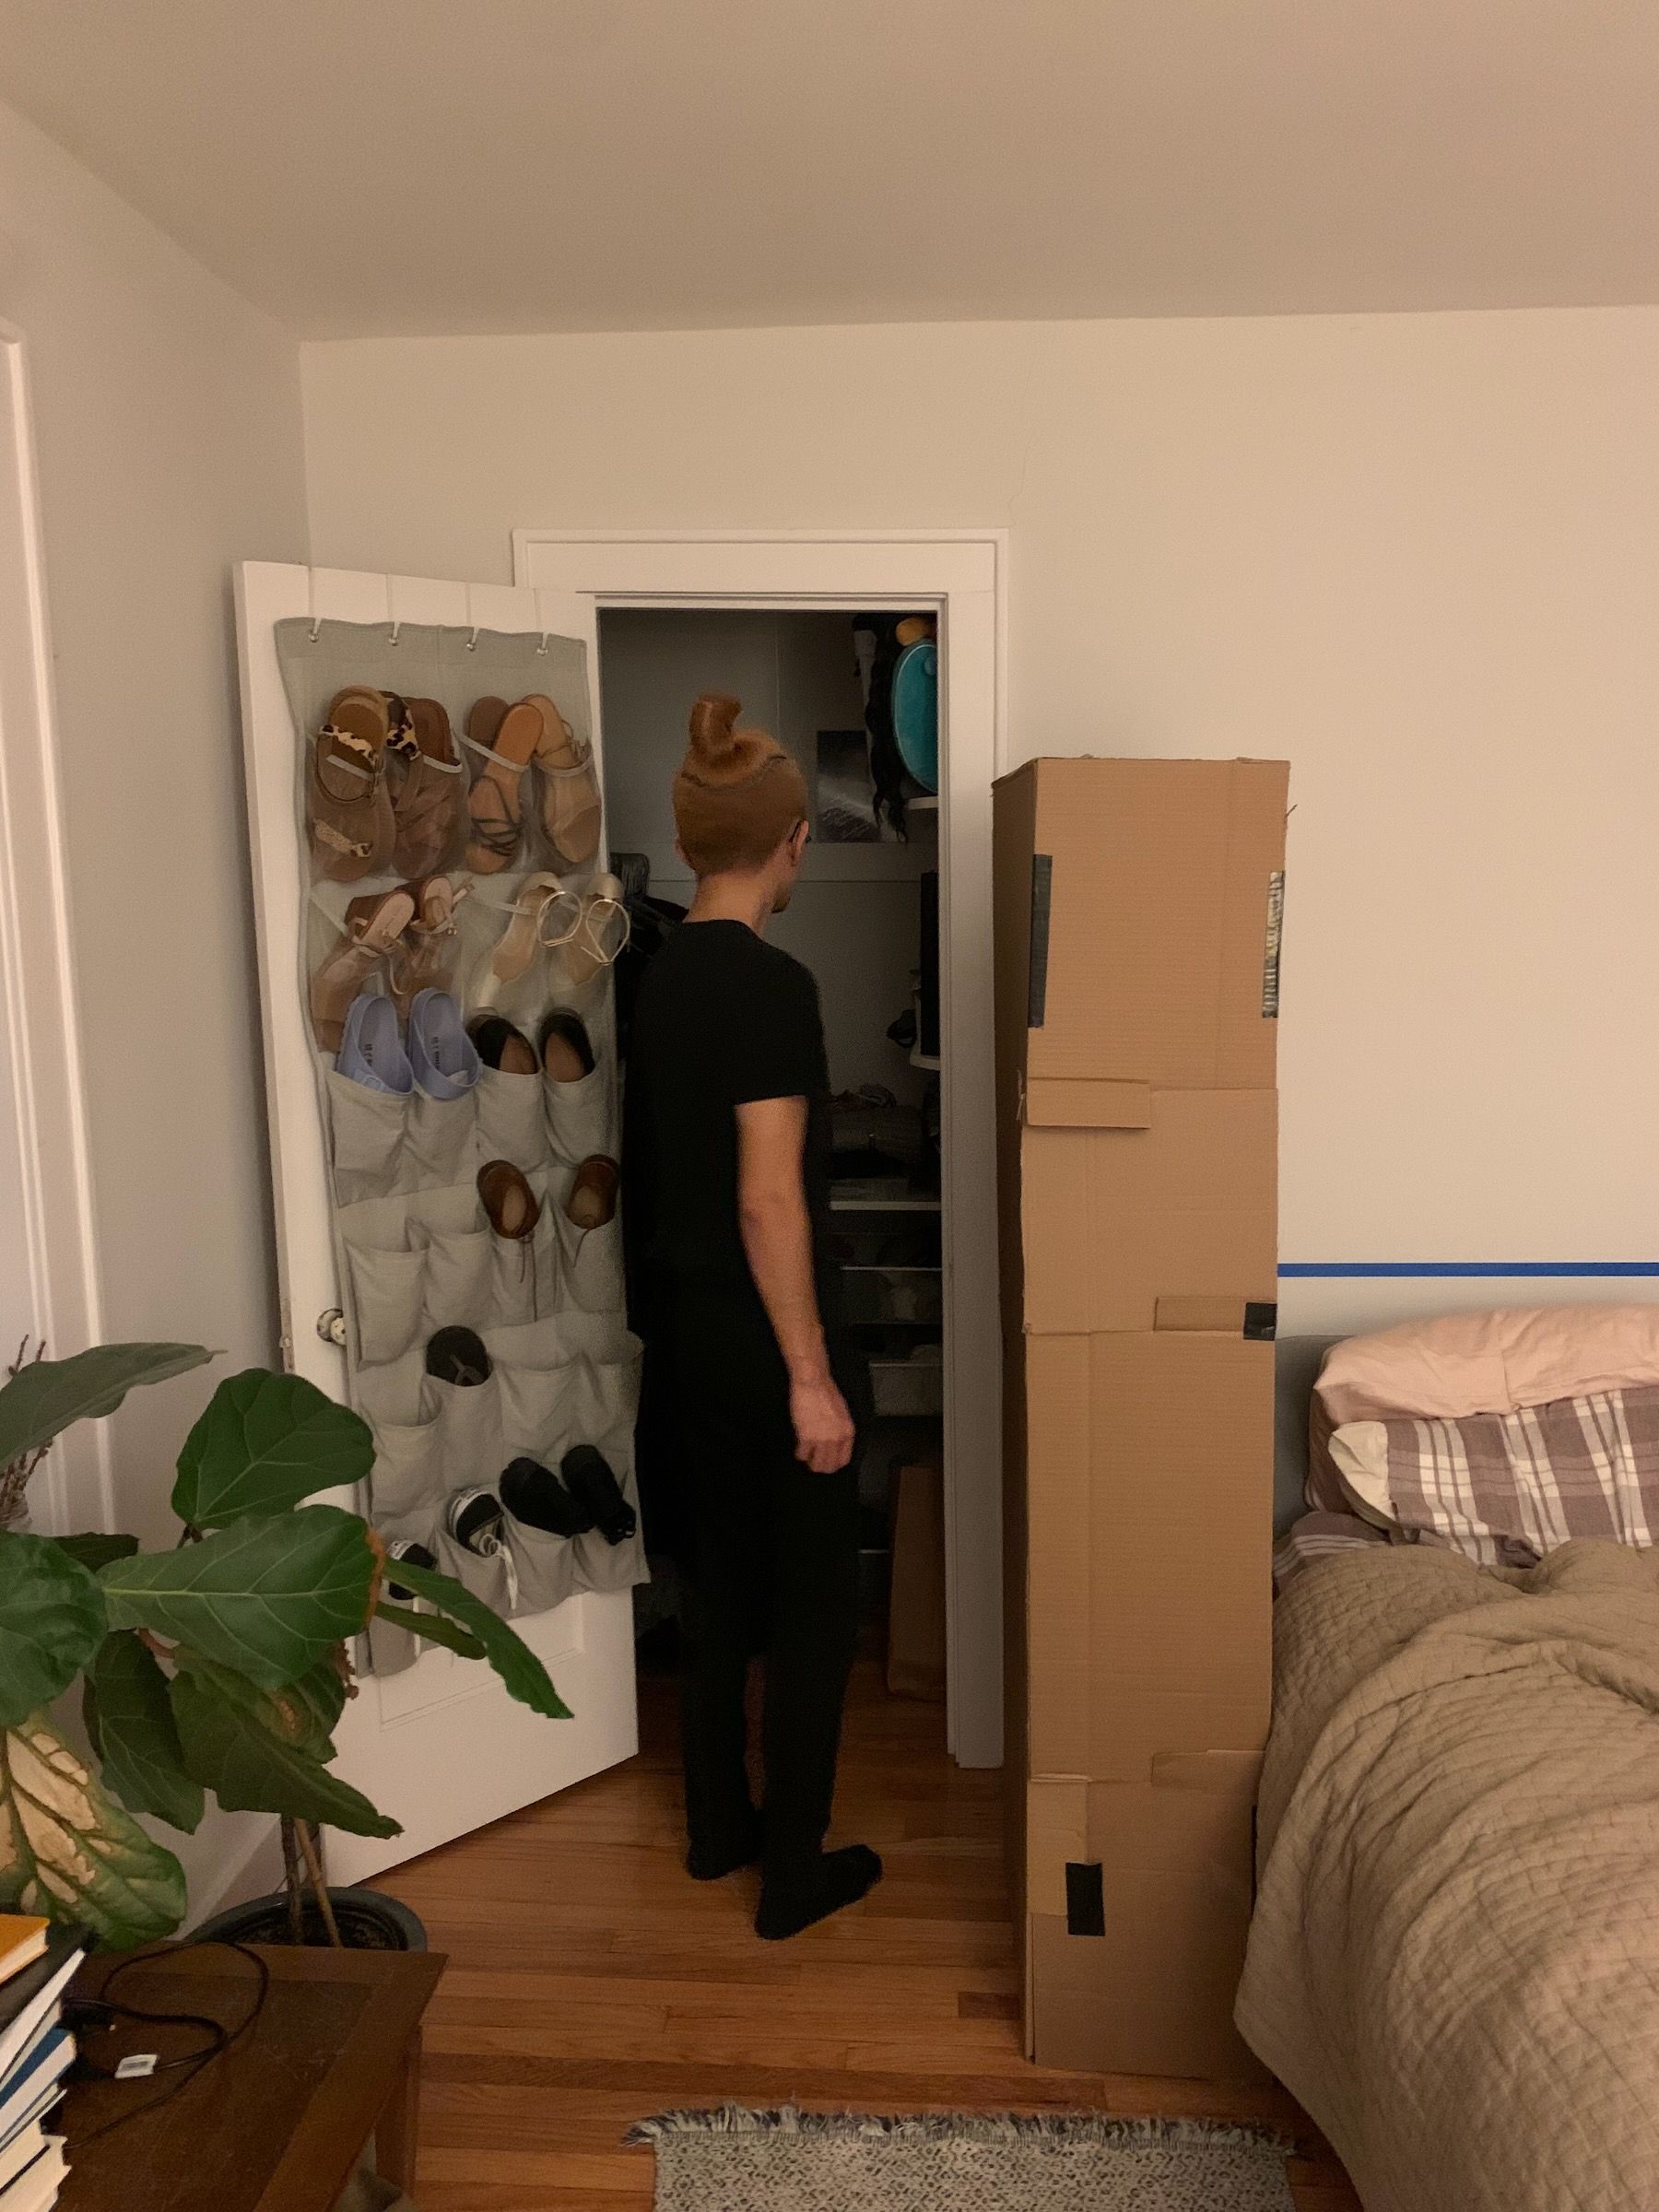
The door on the left is a closet, and the one on the right leads in from the hallway. The idea here was to also make the closet feel a little more like its own small room, and on the other side give more privacy from the hallway.
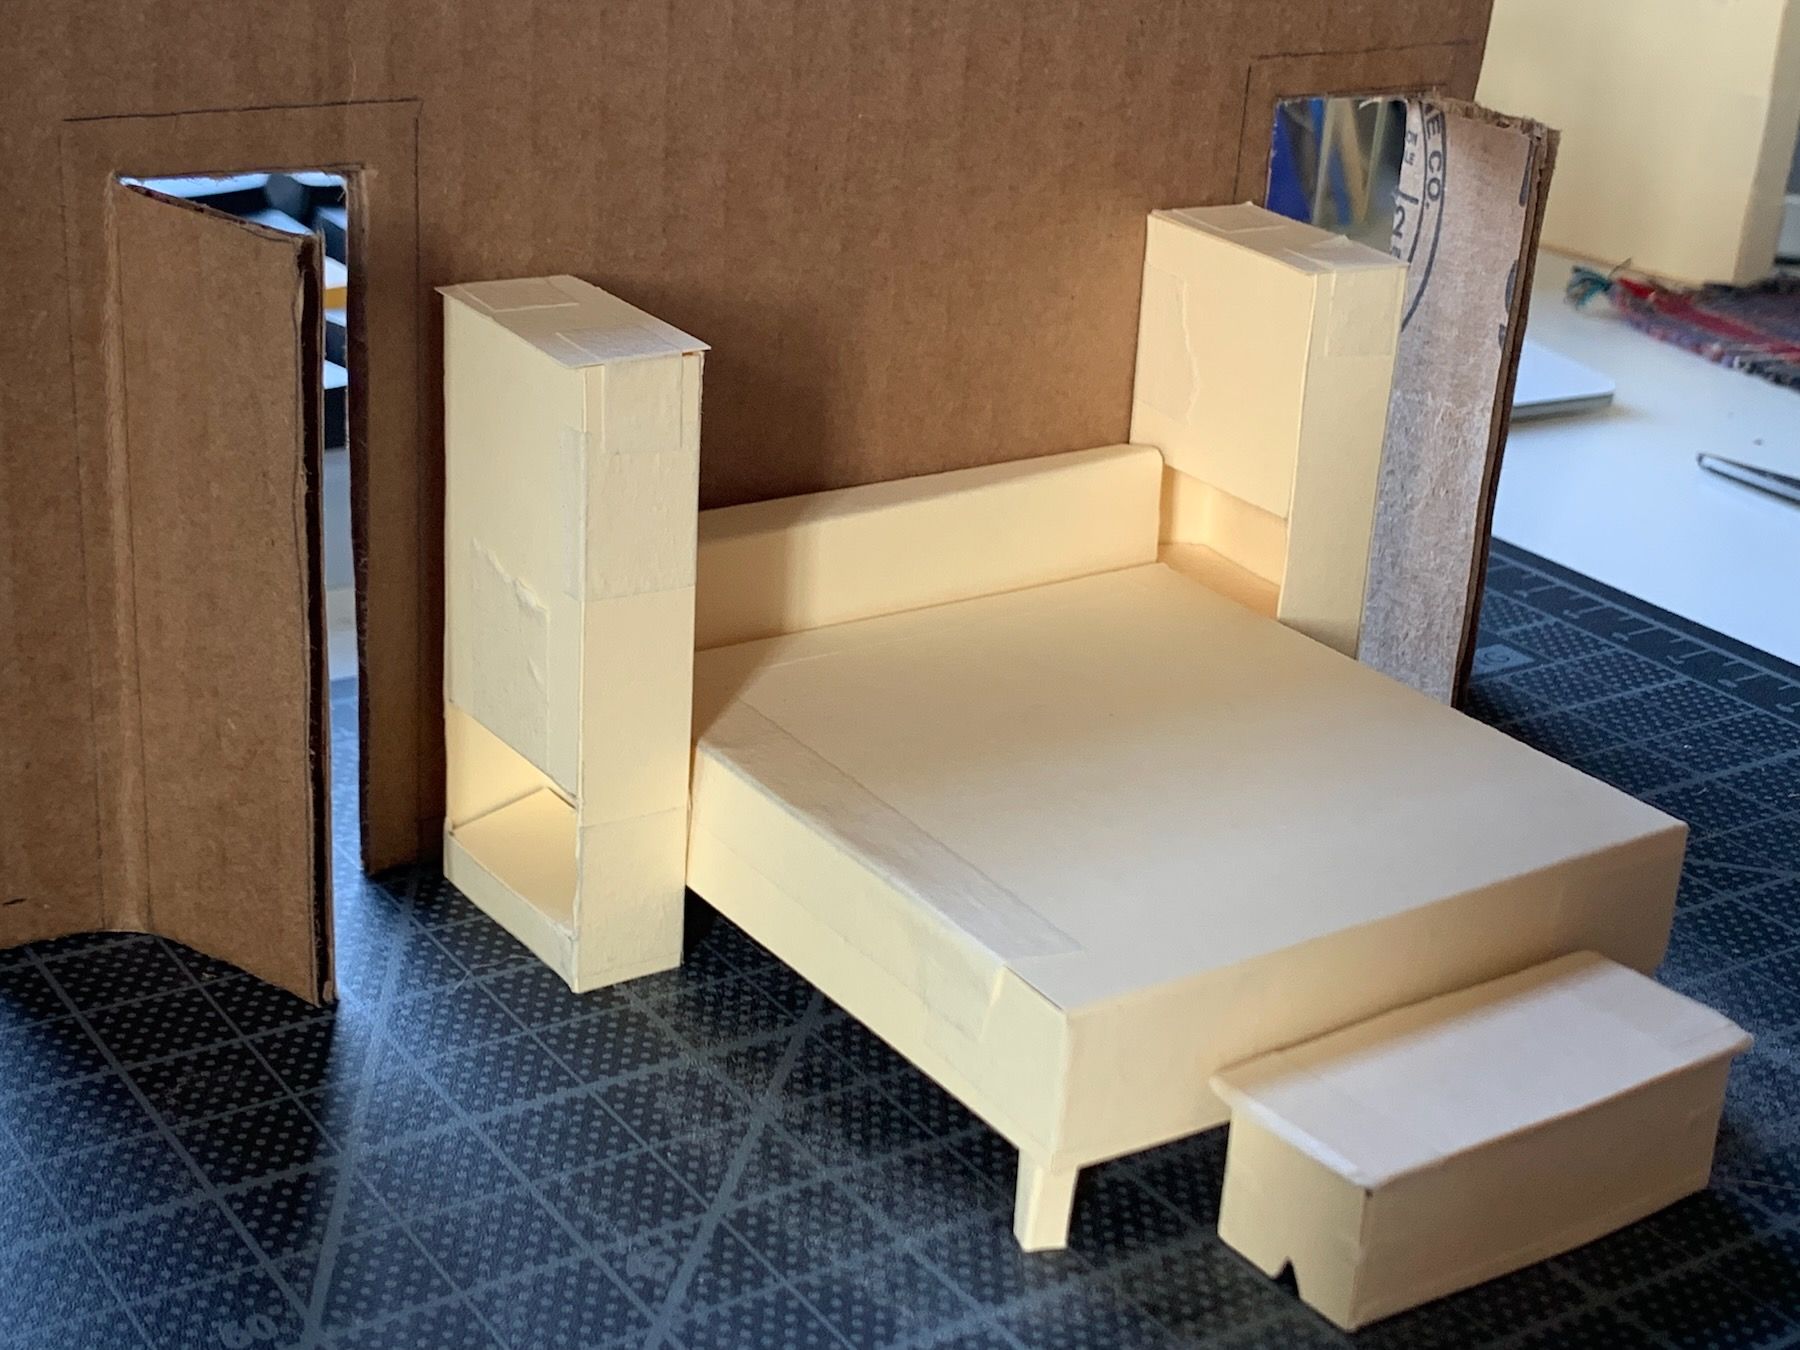
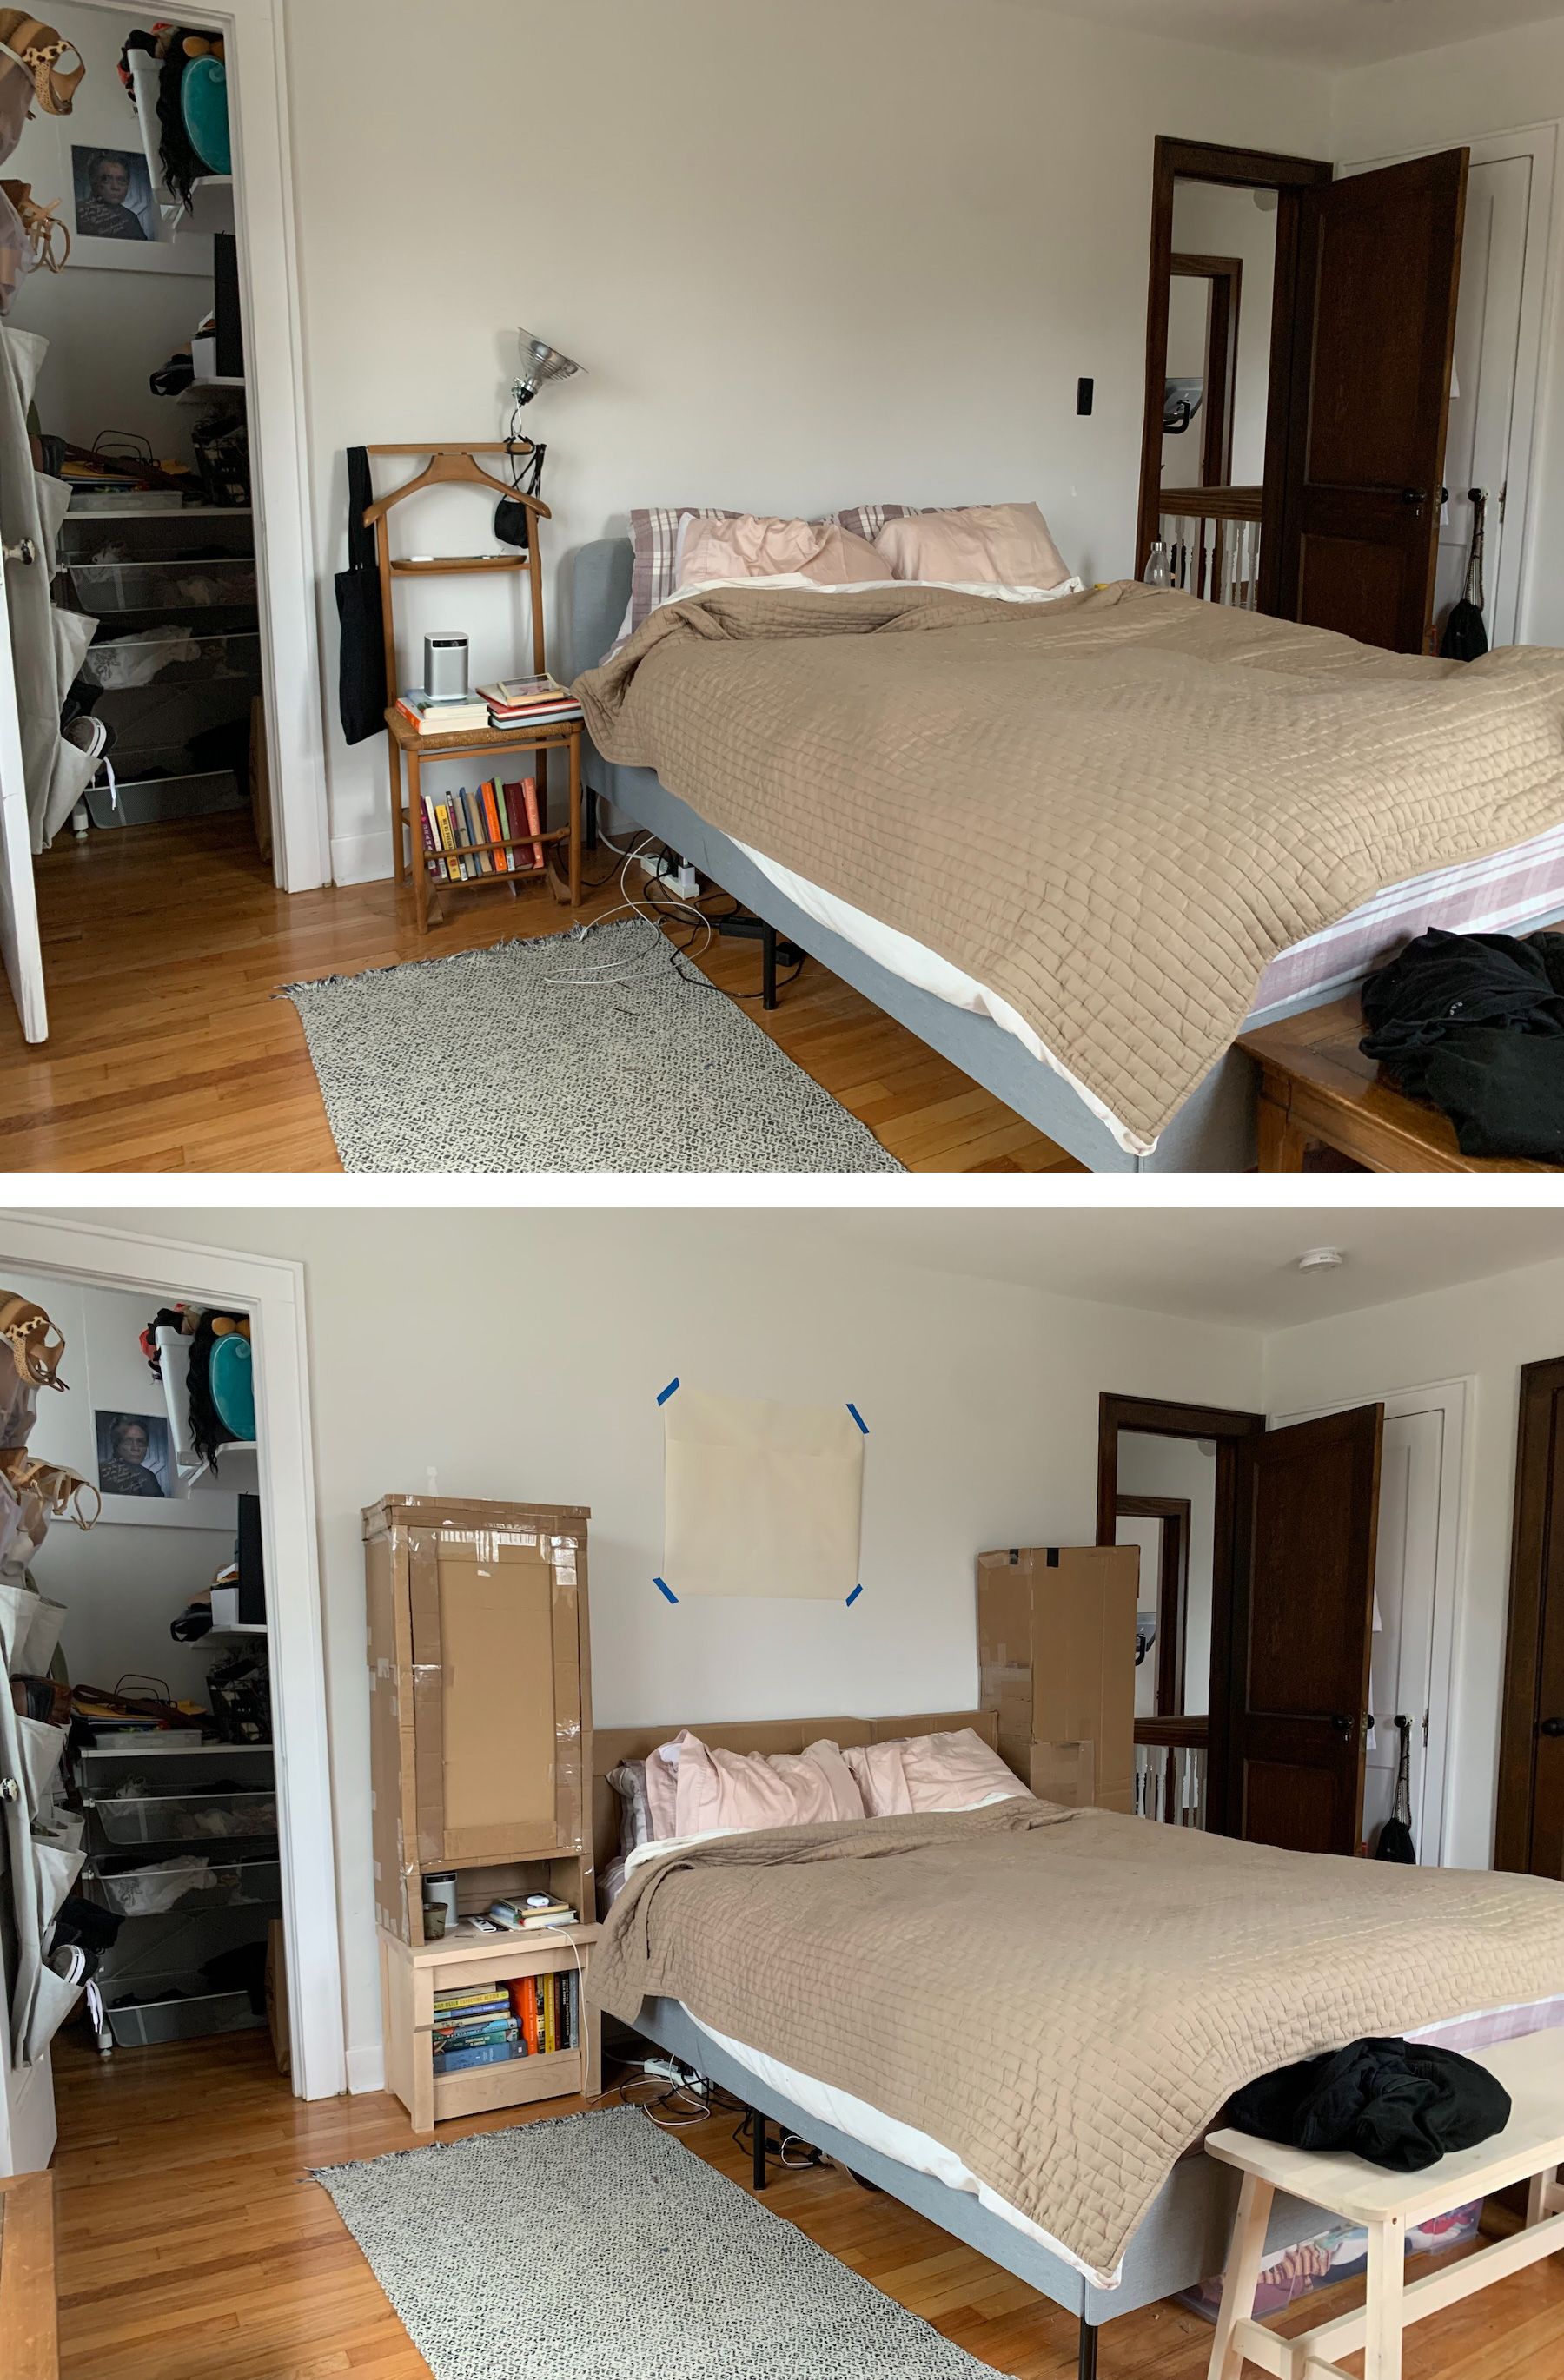
I mocked up the outlines on the wall with painters’ tape:
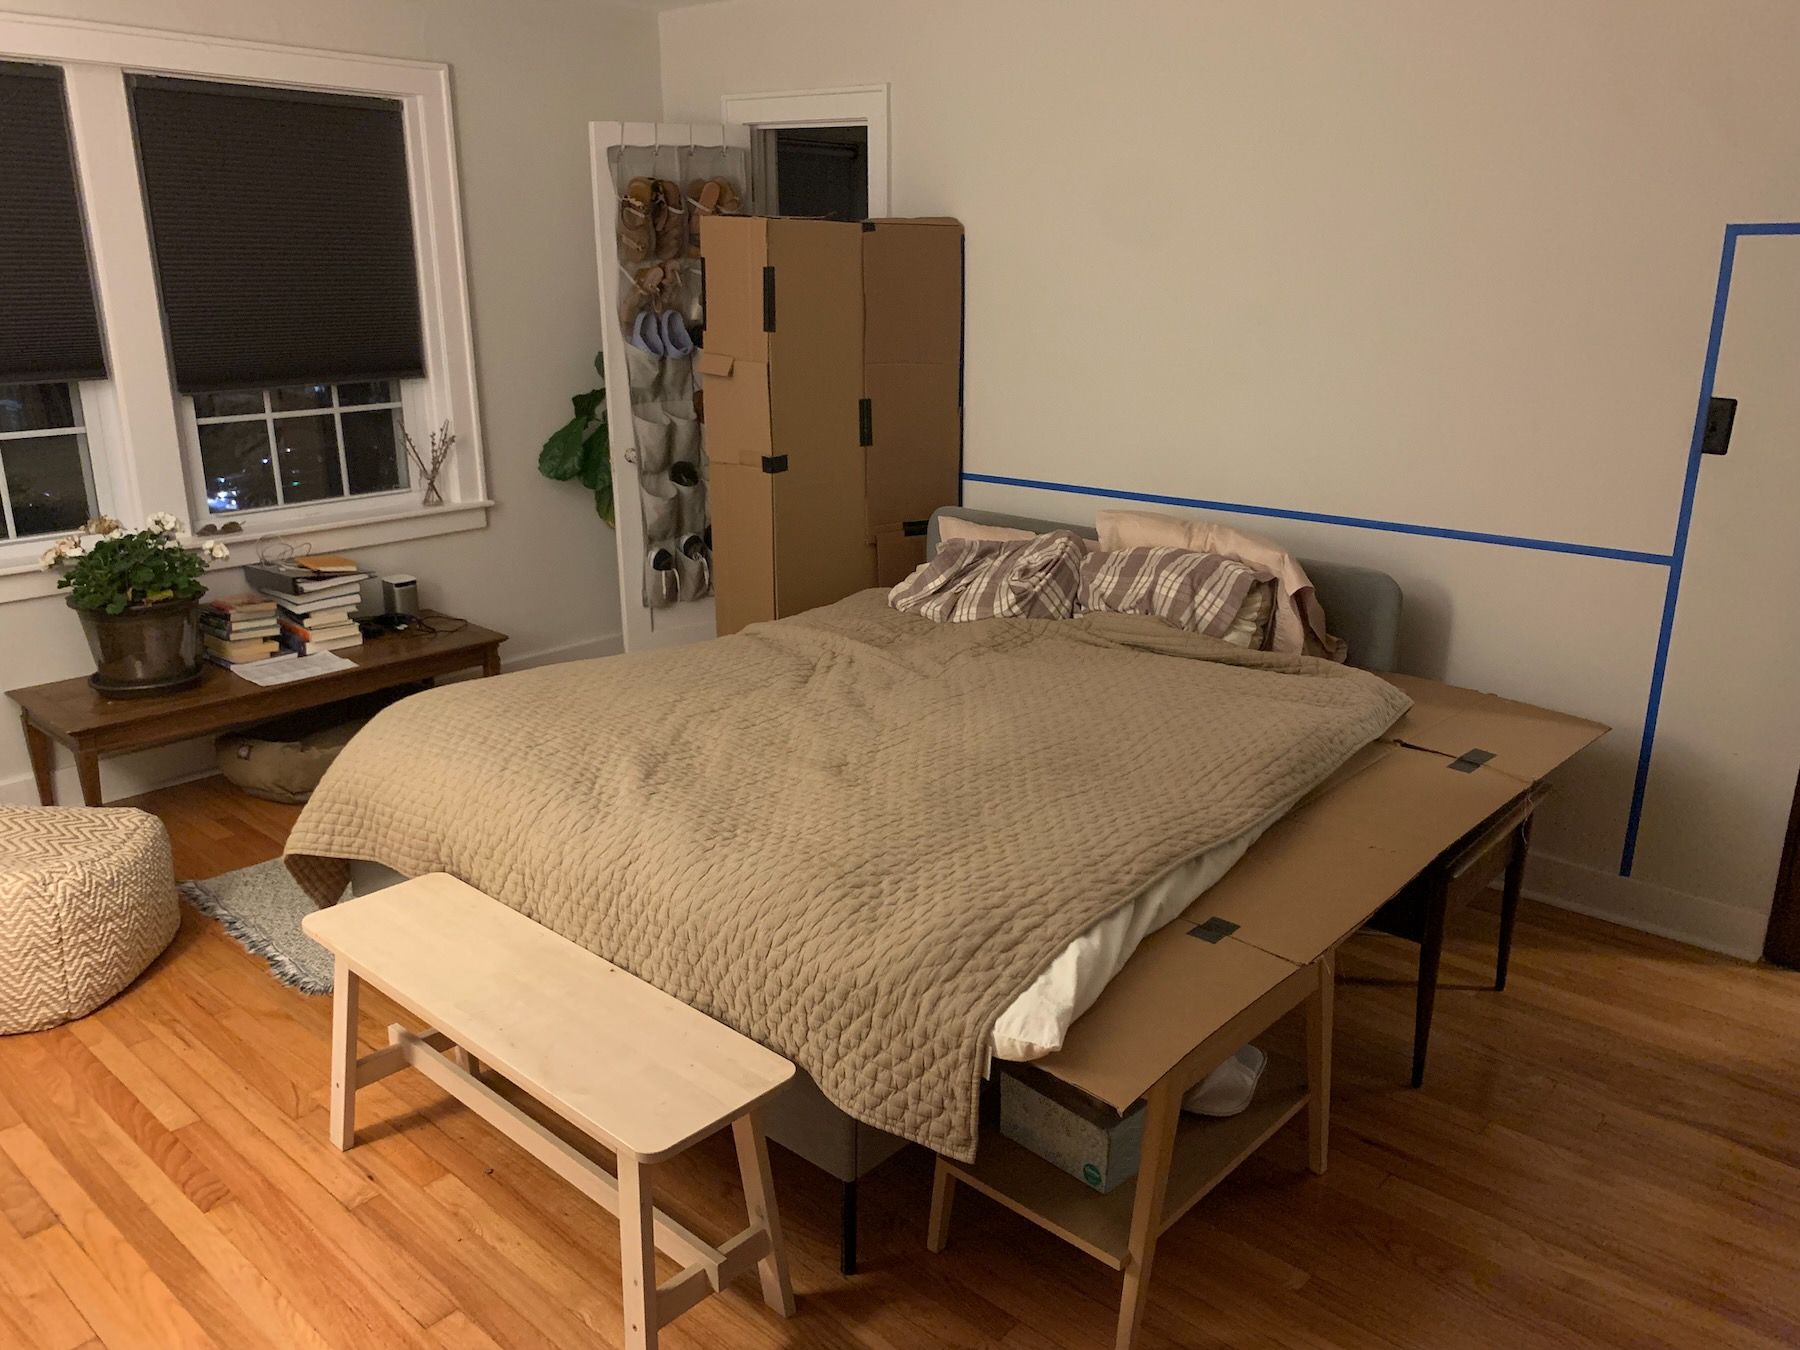
Then mocked up one of the volumes in cardboard and, on the advice of the studio instructors, grabbed some tables and more cardboard to extend our existing bed, in order to see how a king bed would fit in the room.
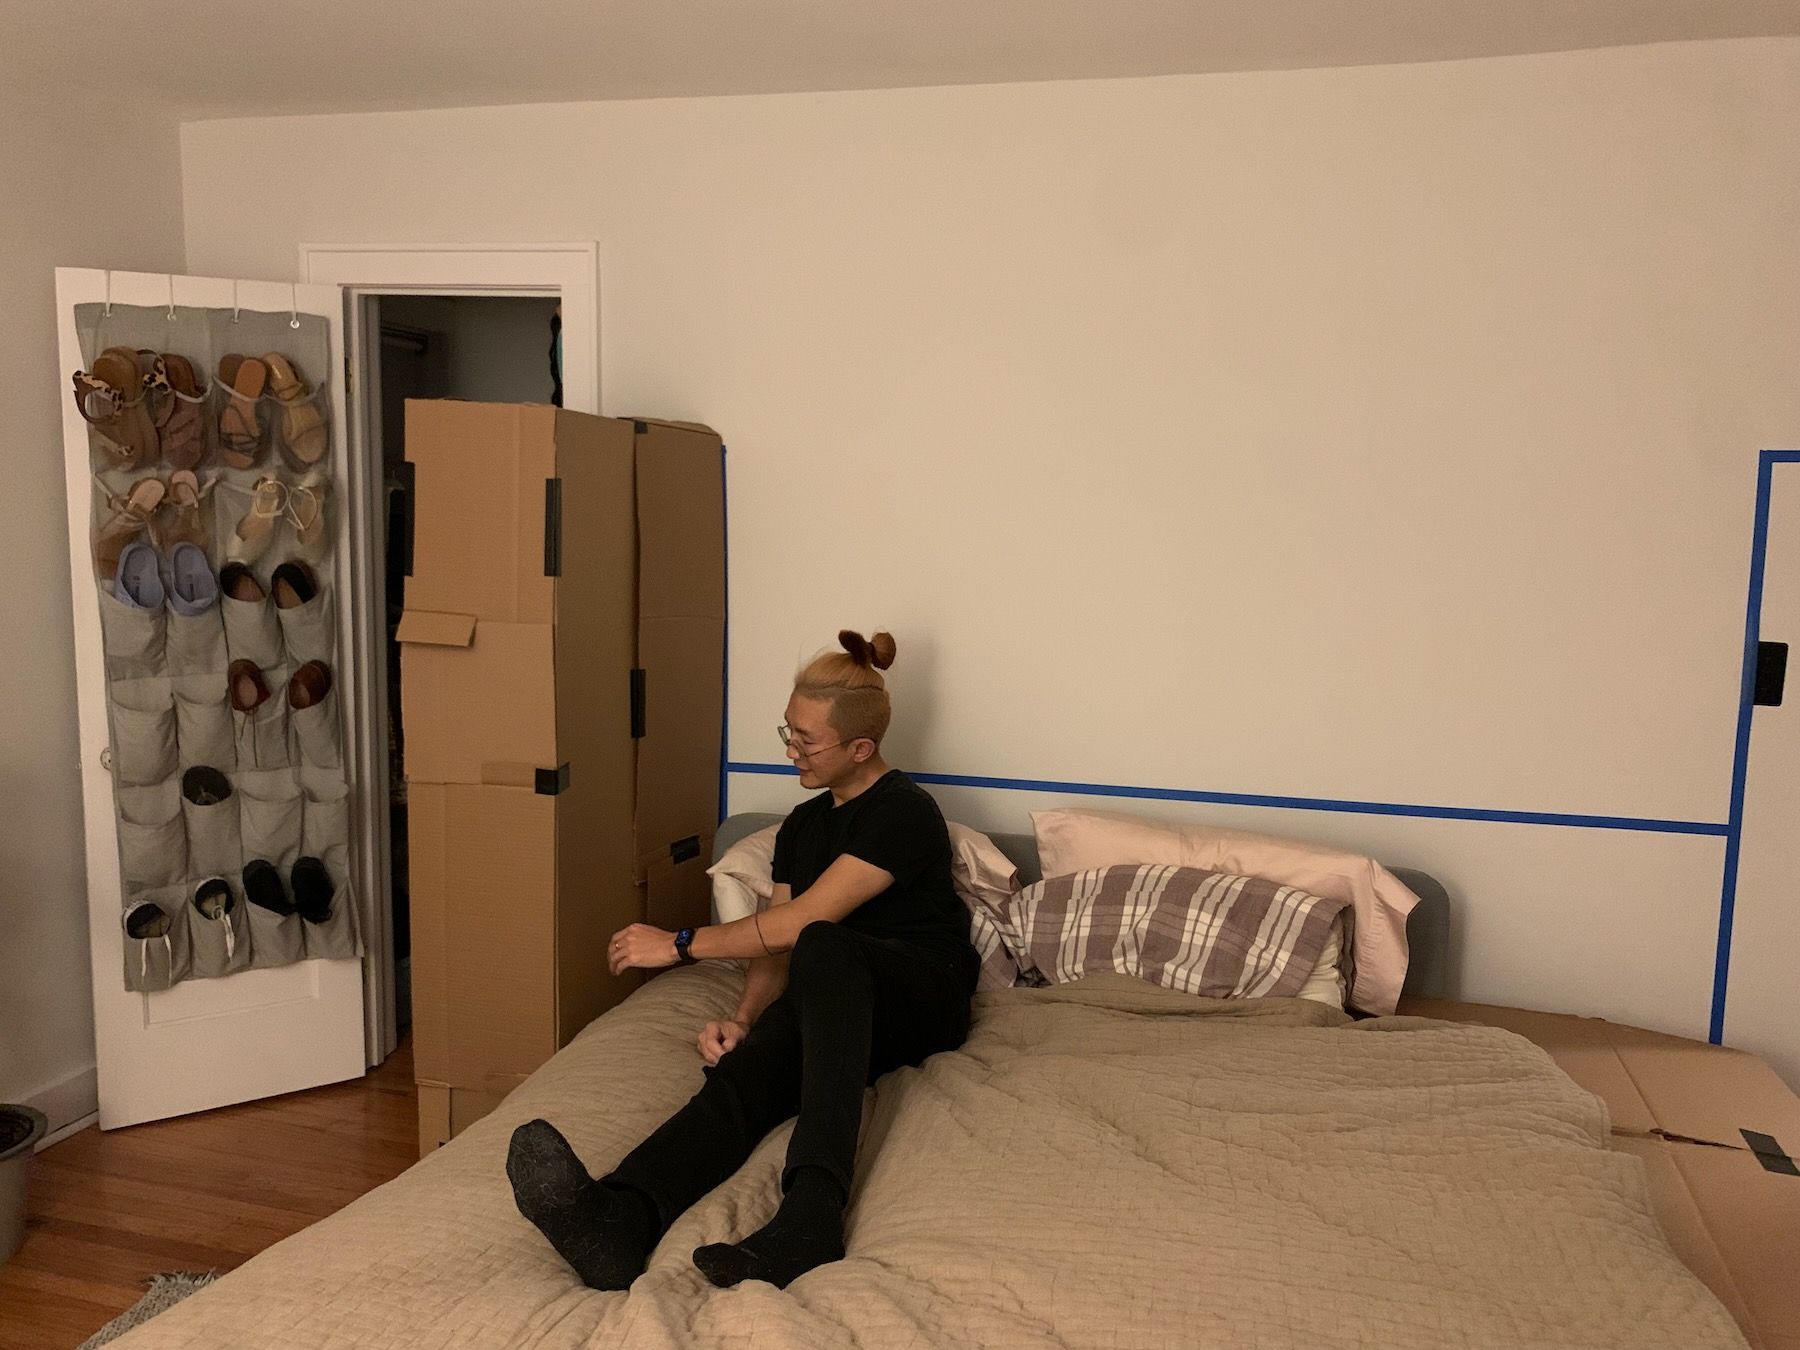
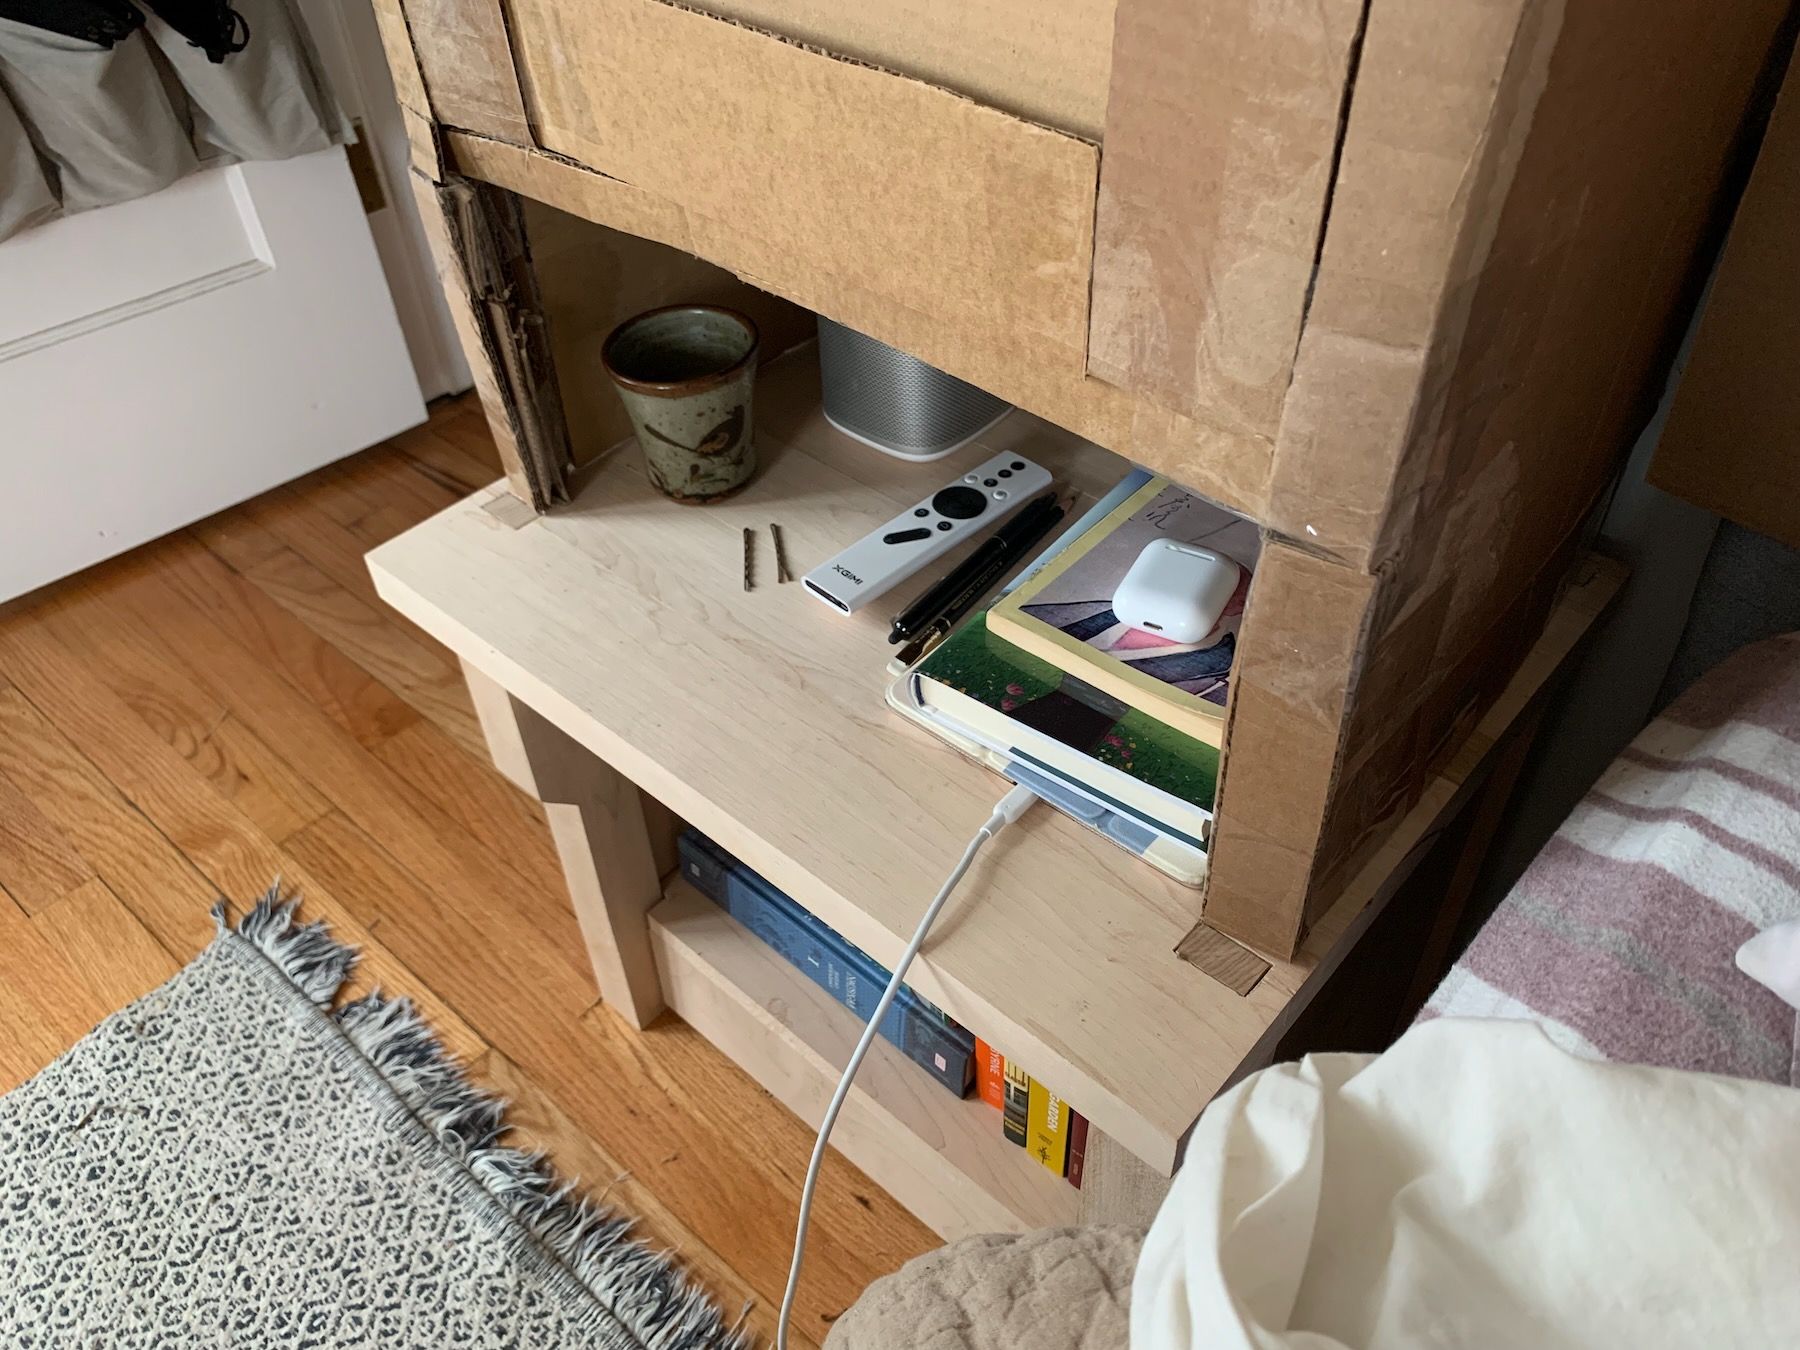
Here’s me testing where side cubby in the cabinet should be when, say, reaching for a glass of water or book:
And testing the closet area:
Then I moved the cardboard cabinet volume to the other side of the bed and tested that, too. All this gave me a ton of valuable information that wasn’t apparent from, even taping it out:
- The king size bed was way too big for the room. Queen bed it is.
- The cabinet units were too deep. The left one made the small closet felt even more cramped.
- The cabinet units were also too tall. Walking into the room from the hallway, you needed to be able to look over them and see the windows for them to feel comfortable, which you couldn’t do at the height in the photos.
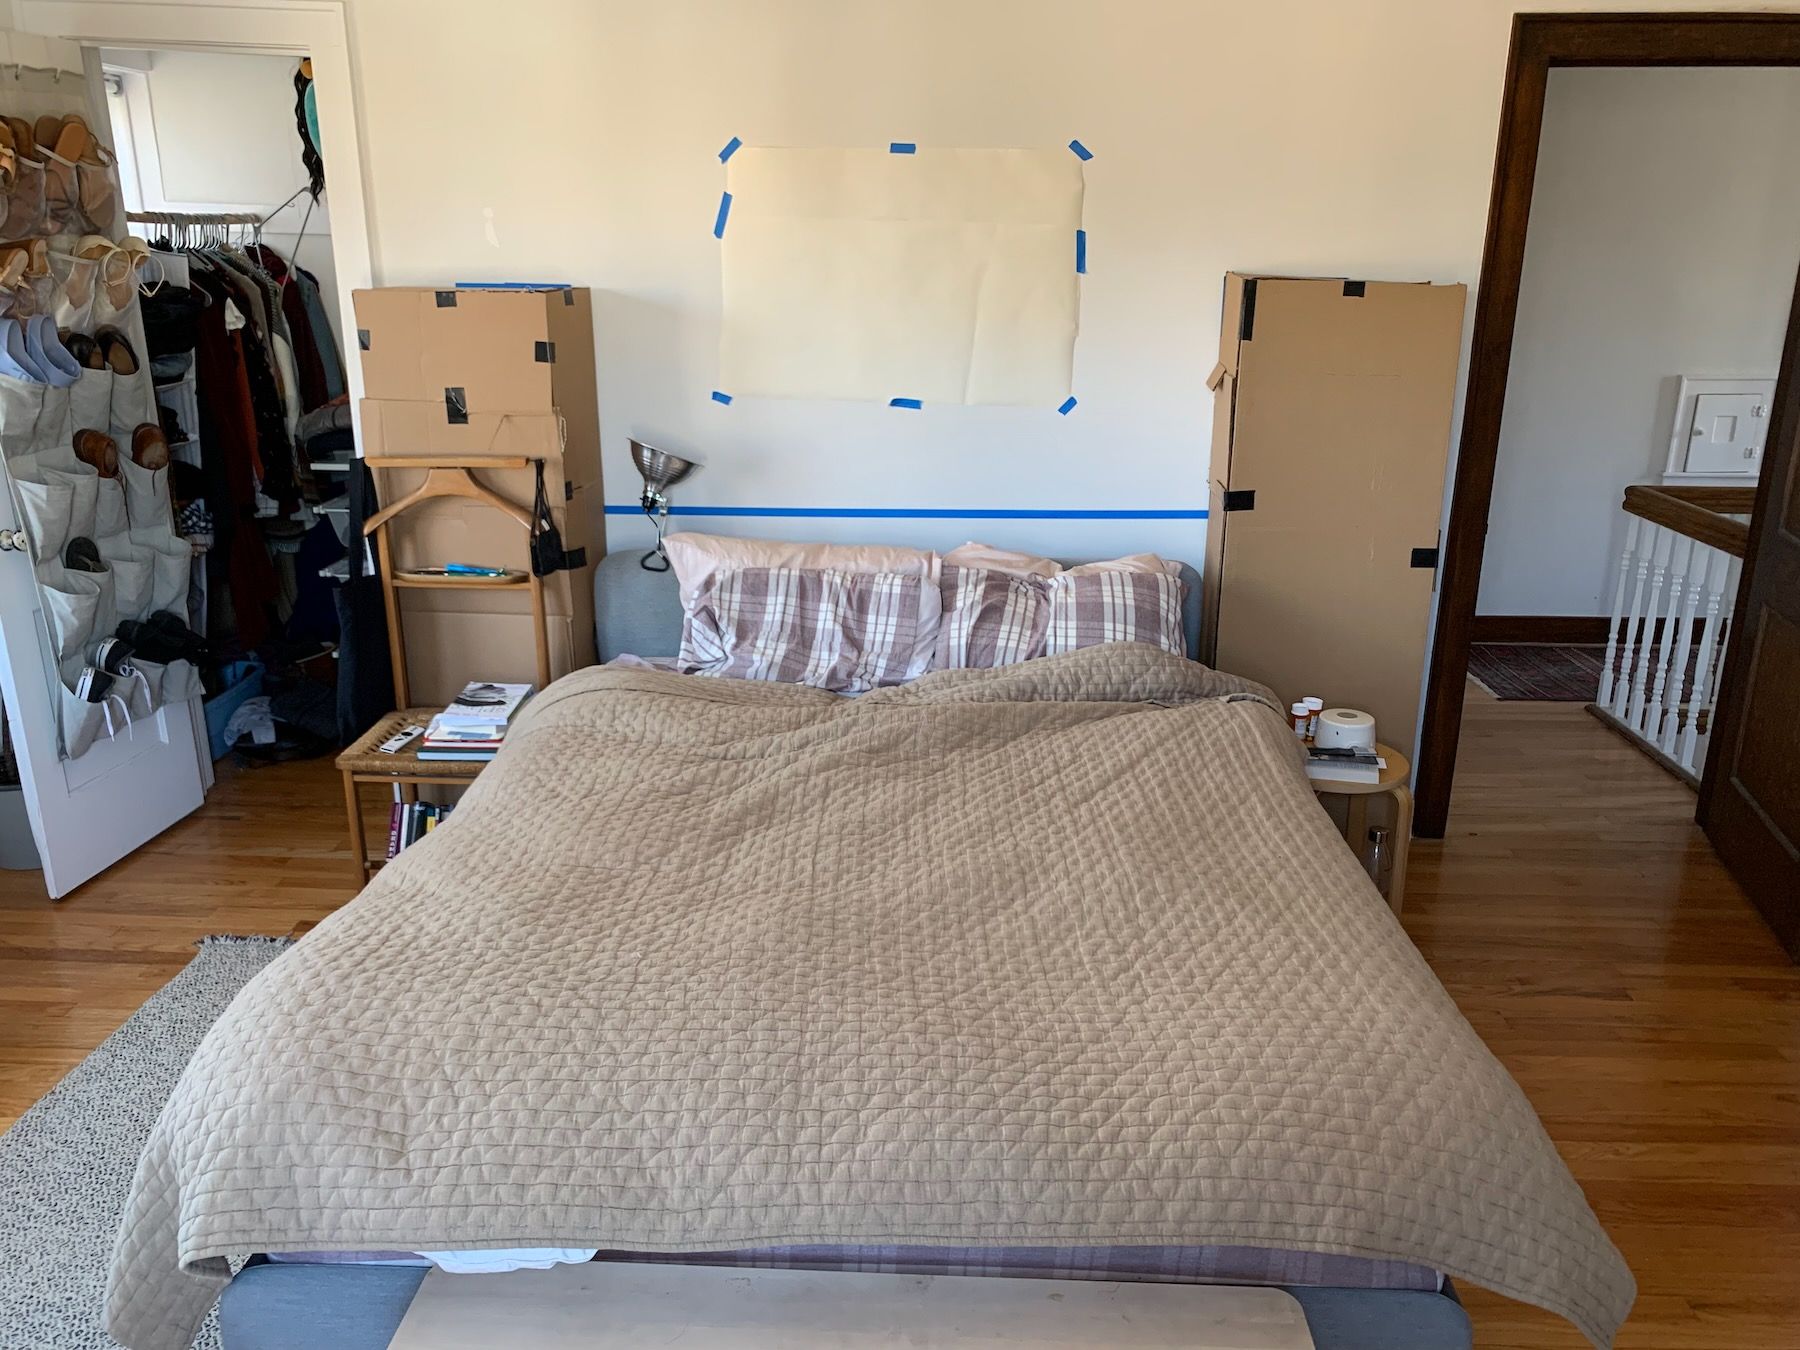
I had the idea to turn the volumes sideway, and it immediately the whole arrangement felt better. The bed felt more like a bed. I mocked up a second cabinet unit, shaved a few inches off the tops, and taped up a couple sheets of paper where I imagined a framed painting or photo could go.
In this process, I also ended up bringing in a smaller bench from elsewhere in the house and moving the original one underneath the windows to the left, which improved that window area. Even with just crude cardboard volumes like this, the whole room felt better.
I couldn’t do my side-cubby idea with these shallower cabinets, so I brought in a couple chairs to simulate some kind of shelf projecting from the cabinets.
On the left side, the seat of the chair I’d been using as my side table before seemed to be a good size and height. The stool on the right was too small. So I went back to the sketchbook to draw up some cabinet designs based on these rough dimensions:
I mocked up the shelf with an area underneath to store books. And adjusted it based on class feedback and trying to address areas of the mockup that felt uncomfortable – like having too wide of an overhang for the table. Each step of the way, when confronted with a design choice, be it the size of the door or the thickness of the trim, I did a Mirror of the Self test, comparing two variations and asking which felt more alive, more timeless, was a better mirror for my deep self.
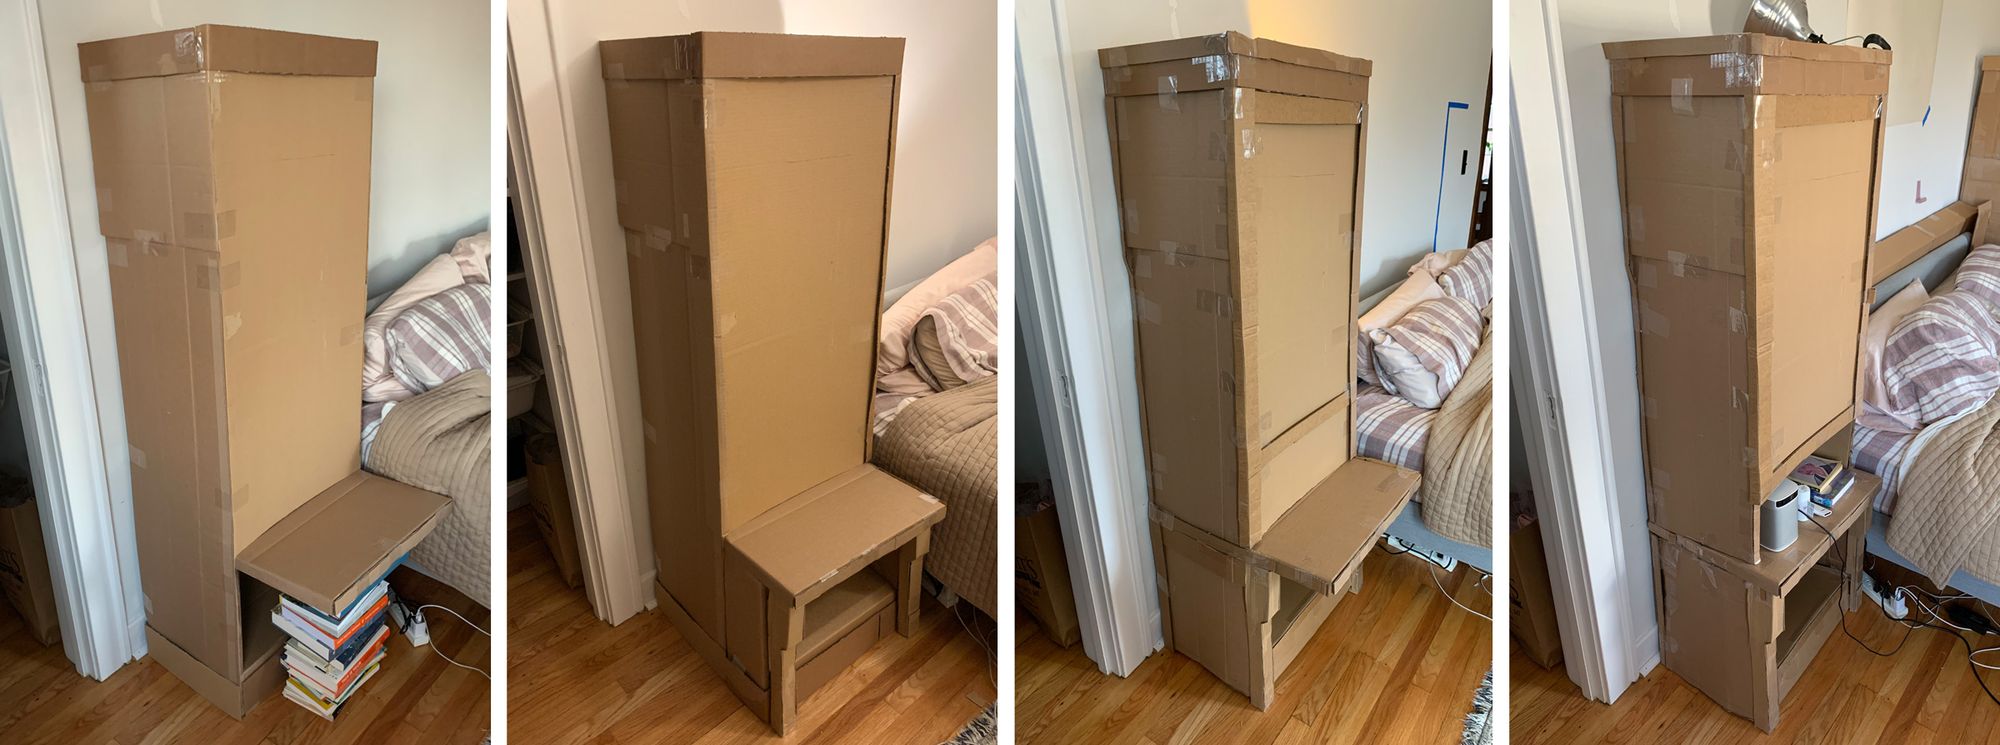
I end up cutting a hole into the cabinet so I could have a big-enough table surface that didn’t project too far out from the main cabinet volume. I liked the way it somewhat-hid medicine bottles, and shielded liquids from errant movements in the middle of the night. I’ve had nightstands with drawers and the drawers always end up a mess. This partial-visibility let me hide things but also encouraged me to keep the table surface tidy.
Here’s where I landed with the cardboard:
I was mostly satisfied with this, save for tweaks to the top of the hutch (at this point I’d started thinking about the top portion as a kind of hutch sitting on the base). I also needed to start construction ASAP as we only had five weeks from start to finish, and the idea had ballooned into a much bigger project than my original bench concept.
For the presentation I decided to concentrate my efforts on building out the base unit.
3b. A Brief Digression on Lumber Dimensions
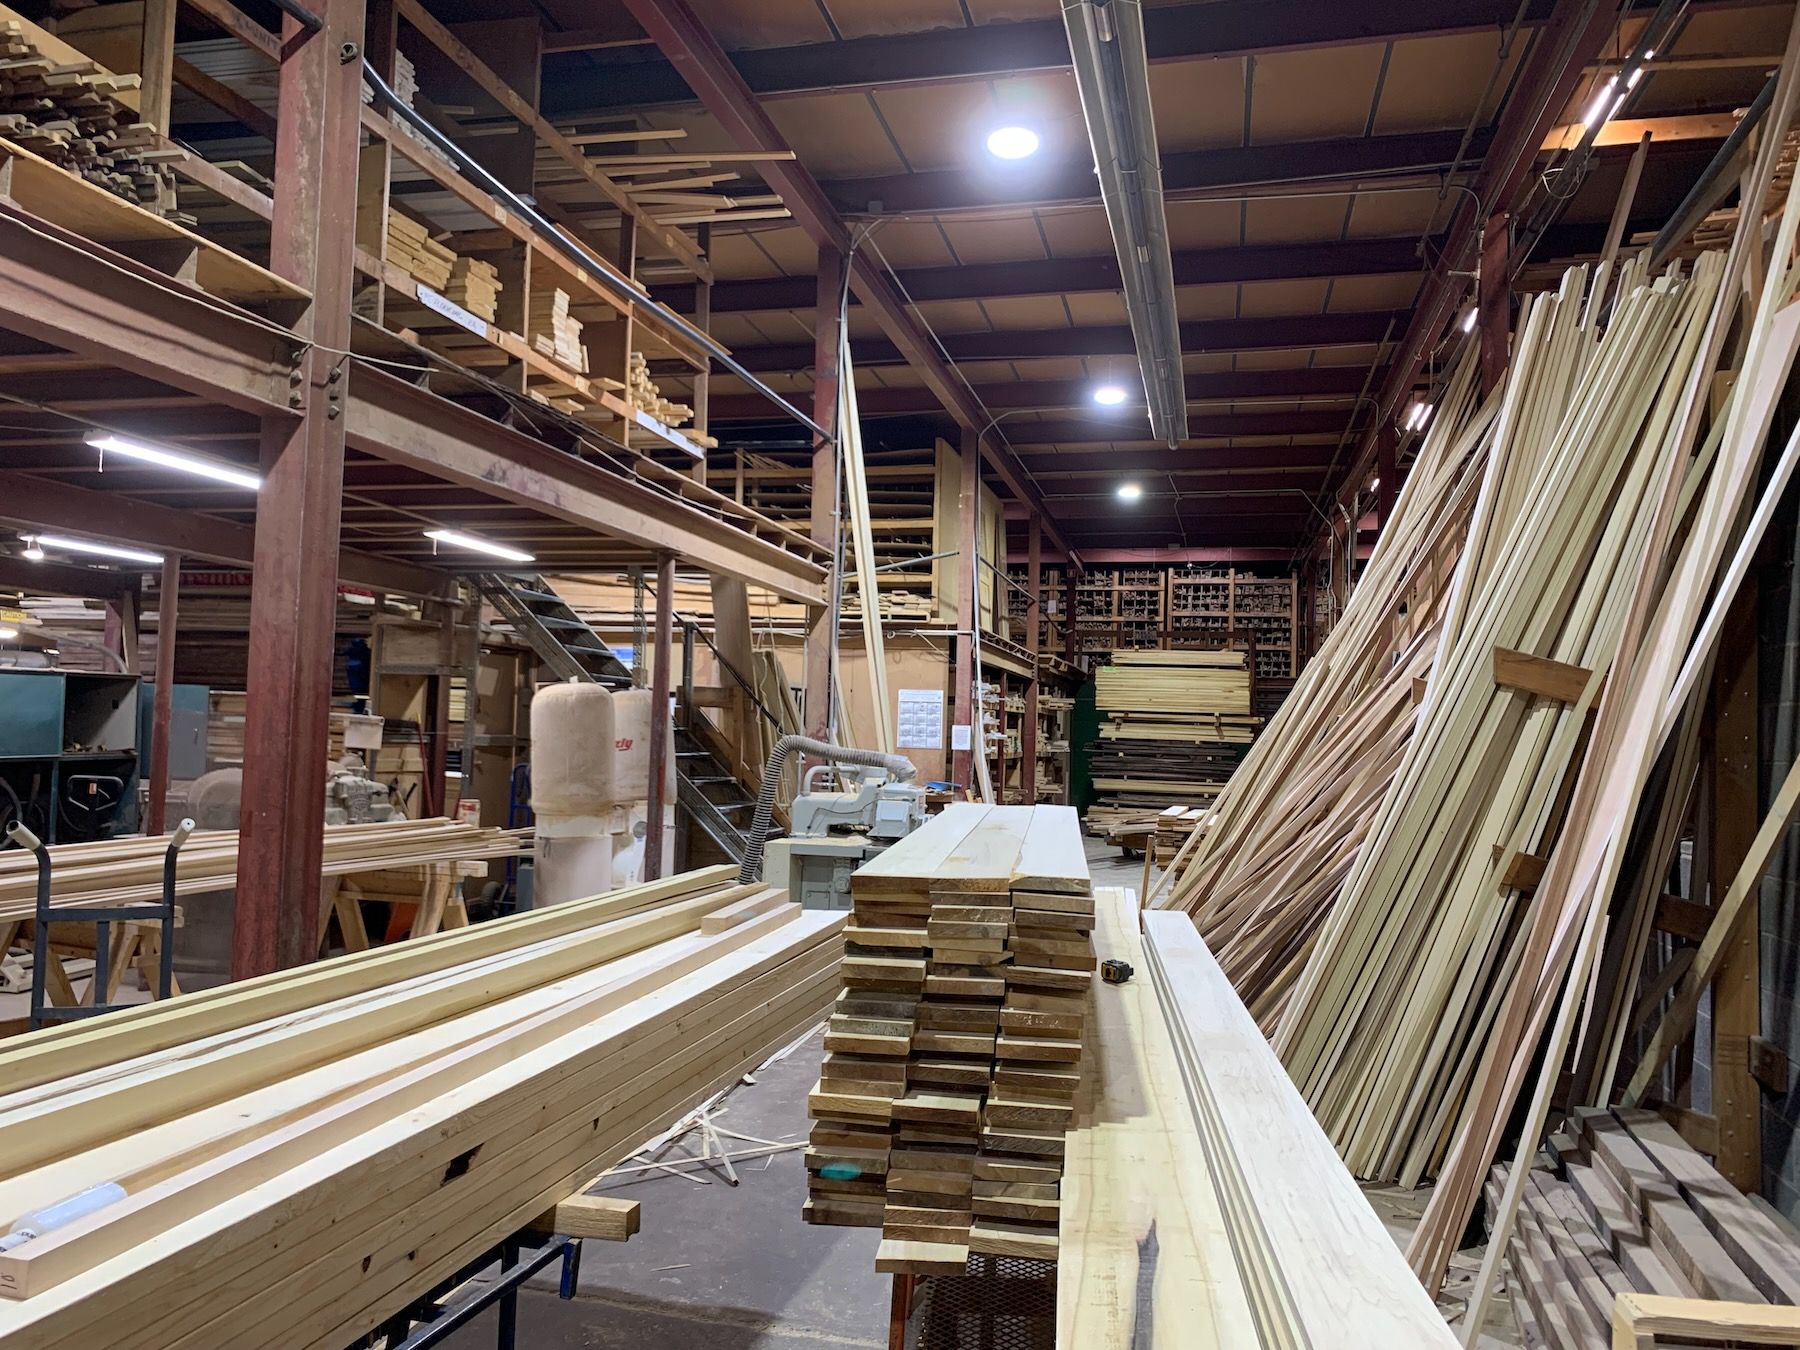
I went to my local lumber yard and had a great conversation with the guy behind the counter, Tom. I’d been there before but had only gotten plywood, and I told him about the class and project, showed pictures of my cardboard mockups. He helped me wrap my head around all the terminology.
Lumber thickness here in the States is denoted in quarters of an inch, which reflect the freshly-milled dimensions. So a 4/4 (four quarters) board is an inch thick, an 8/4 board two inches thick. Unless you’re going for a rough sawn look, you’re typically planing or sanding the surfaces down, which shaves off, in this case, about a quarter of an inch. (That’s why a 2x4 construction stud’s actual dimensions are less than 2 inches by 4 inches, because the rough 2x4 board has been sanded down).
If you have the equipment at home, you can plane the surfaces smooth to your desired thickness. But lumber yards can also do it for you (as well as joint/cut one or both long edges straight) for a small fee. They also cut the longer boards crosswise so I could fit them in my compact SUV.
4. Construction
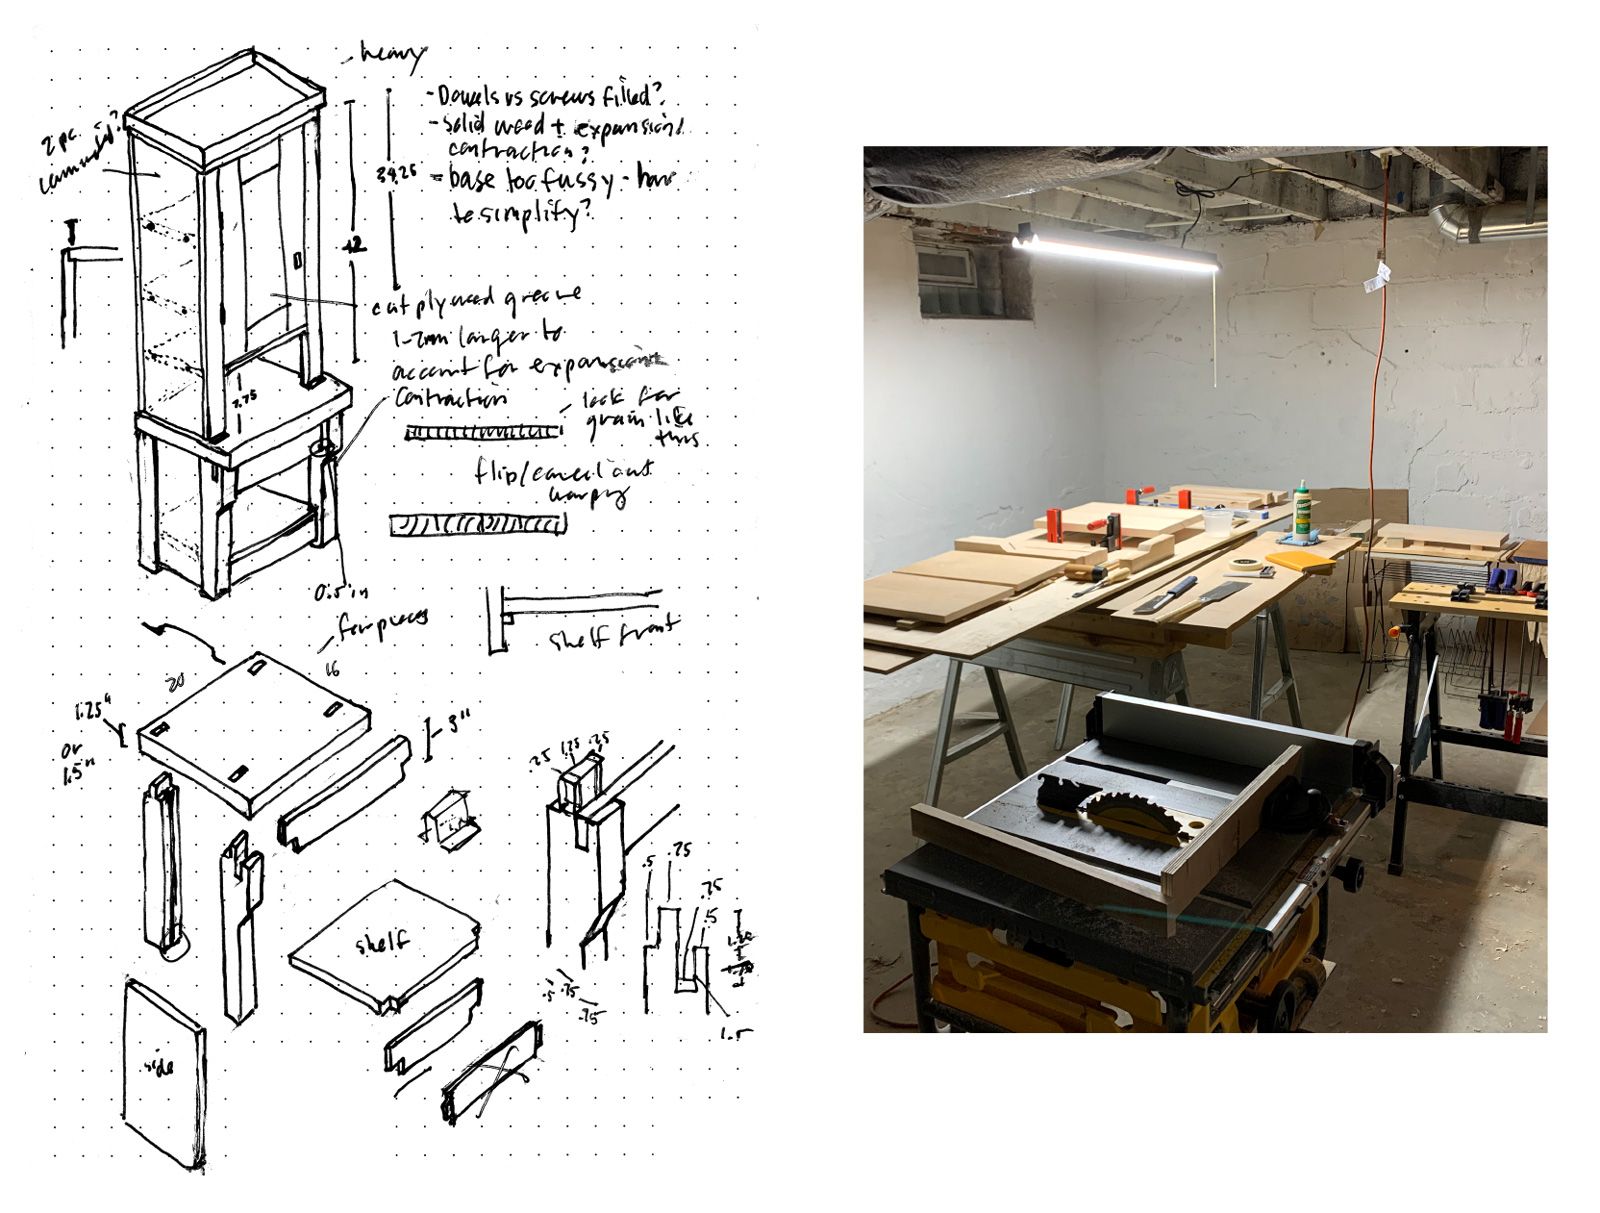
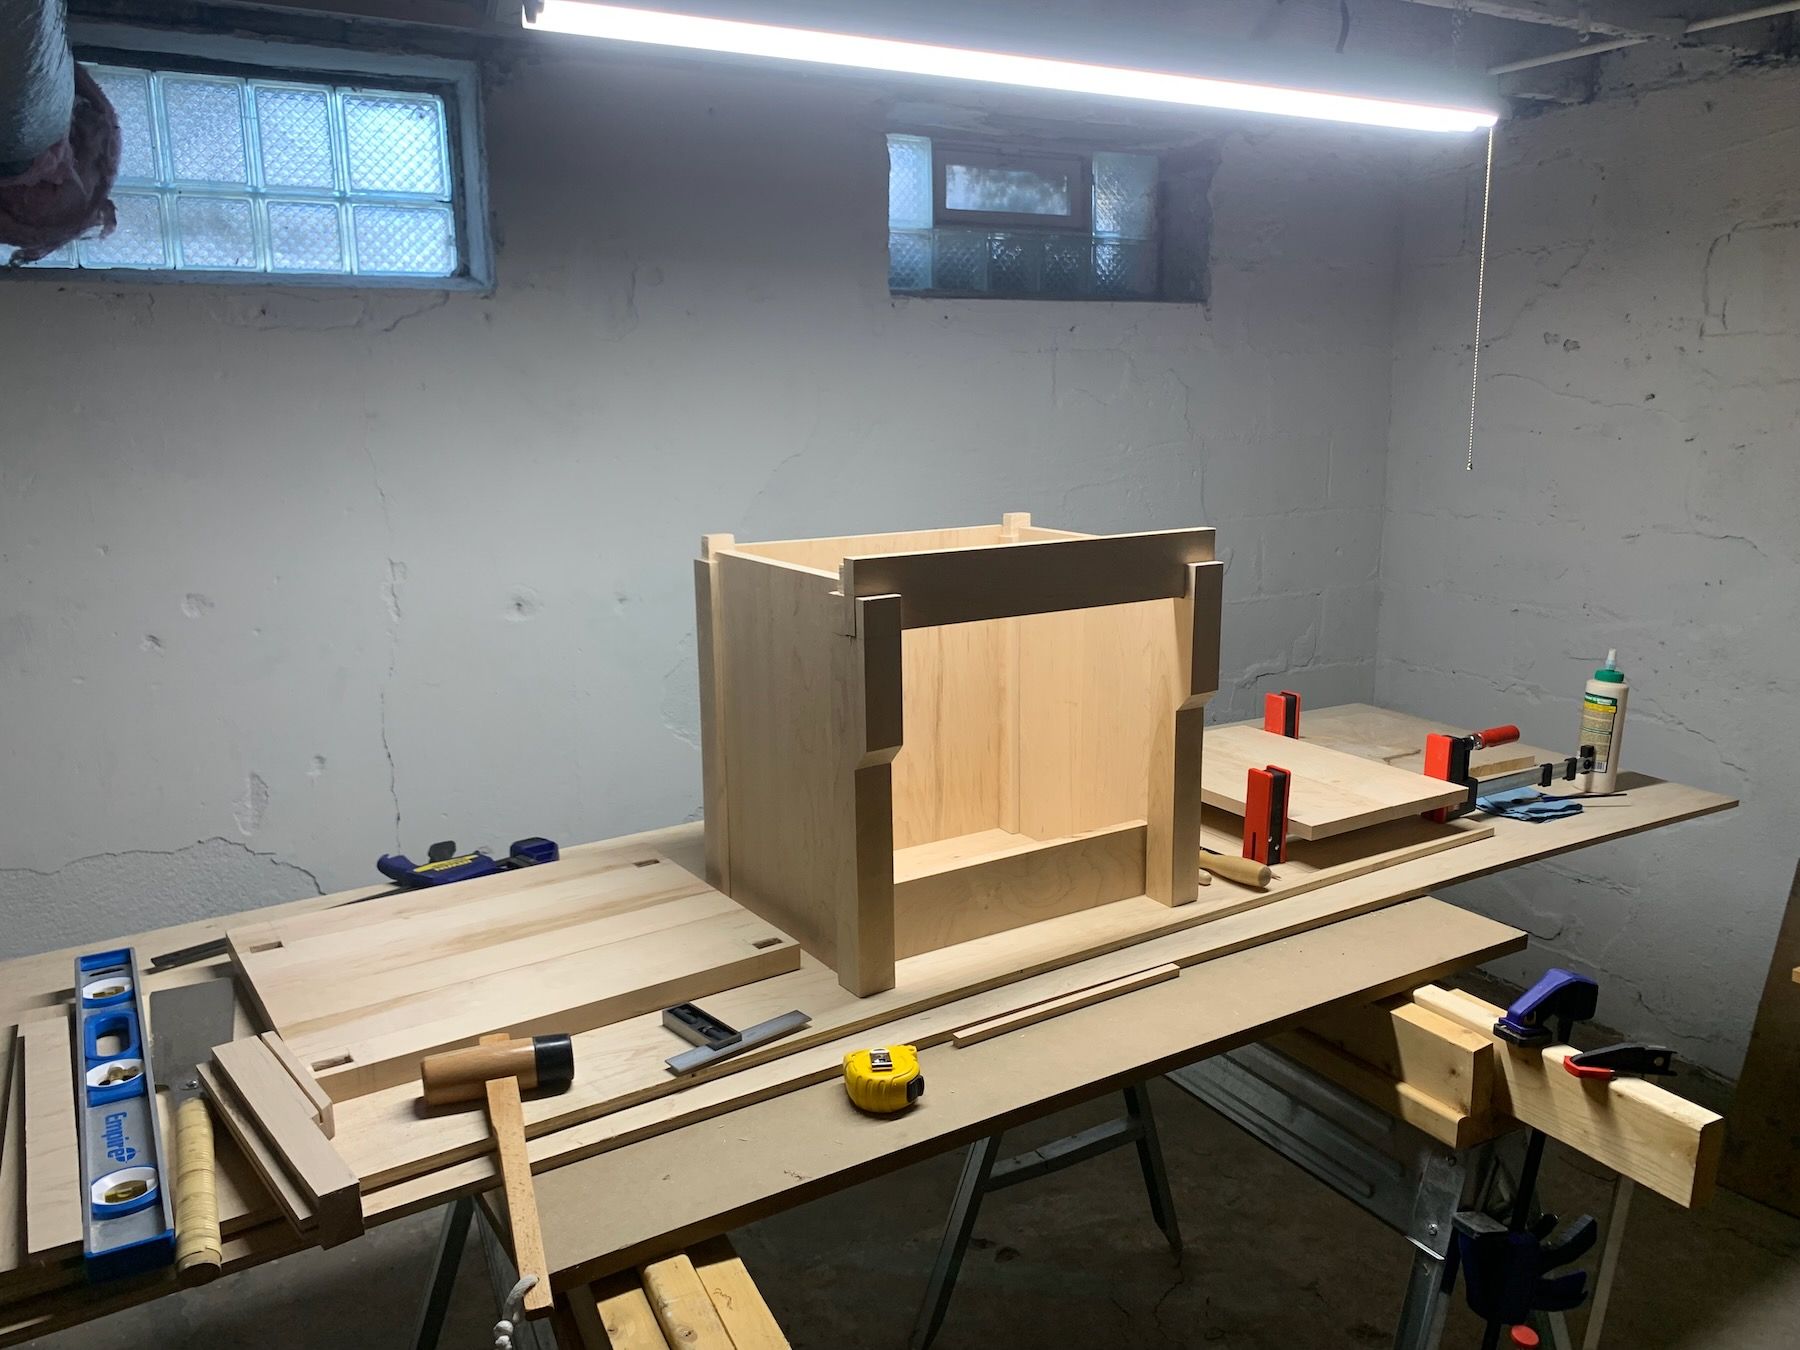
Lumber-wise I ended up going with hard maple, which in hindsight was maybe not the easier material to work with for a novice/intermediate woodworker like me. I was also trying to attempt some more complicated joinery, as seen in my exploded sketch above. I spent an entire day just cutting the mortises (slots) in the tabletop to fit the leg tenons, partly due to not having the right tools for the job. If I were to do this over again, I would’ve picked a softer wood.
5. The Result
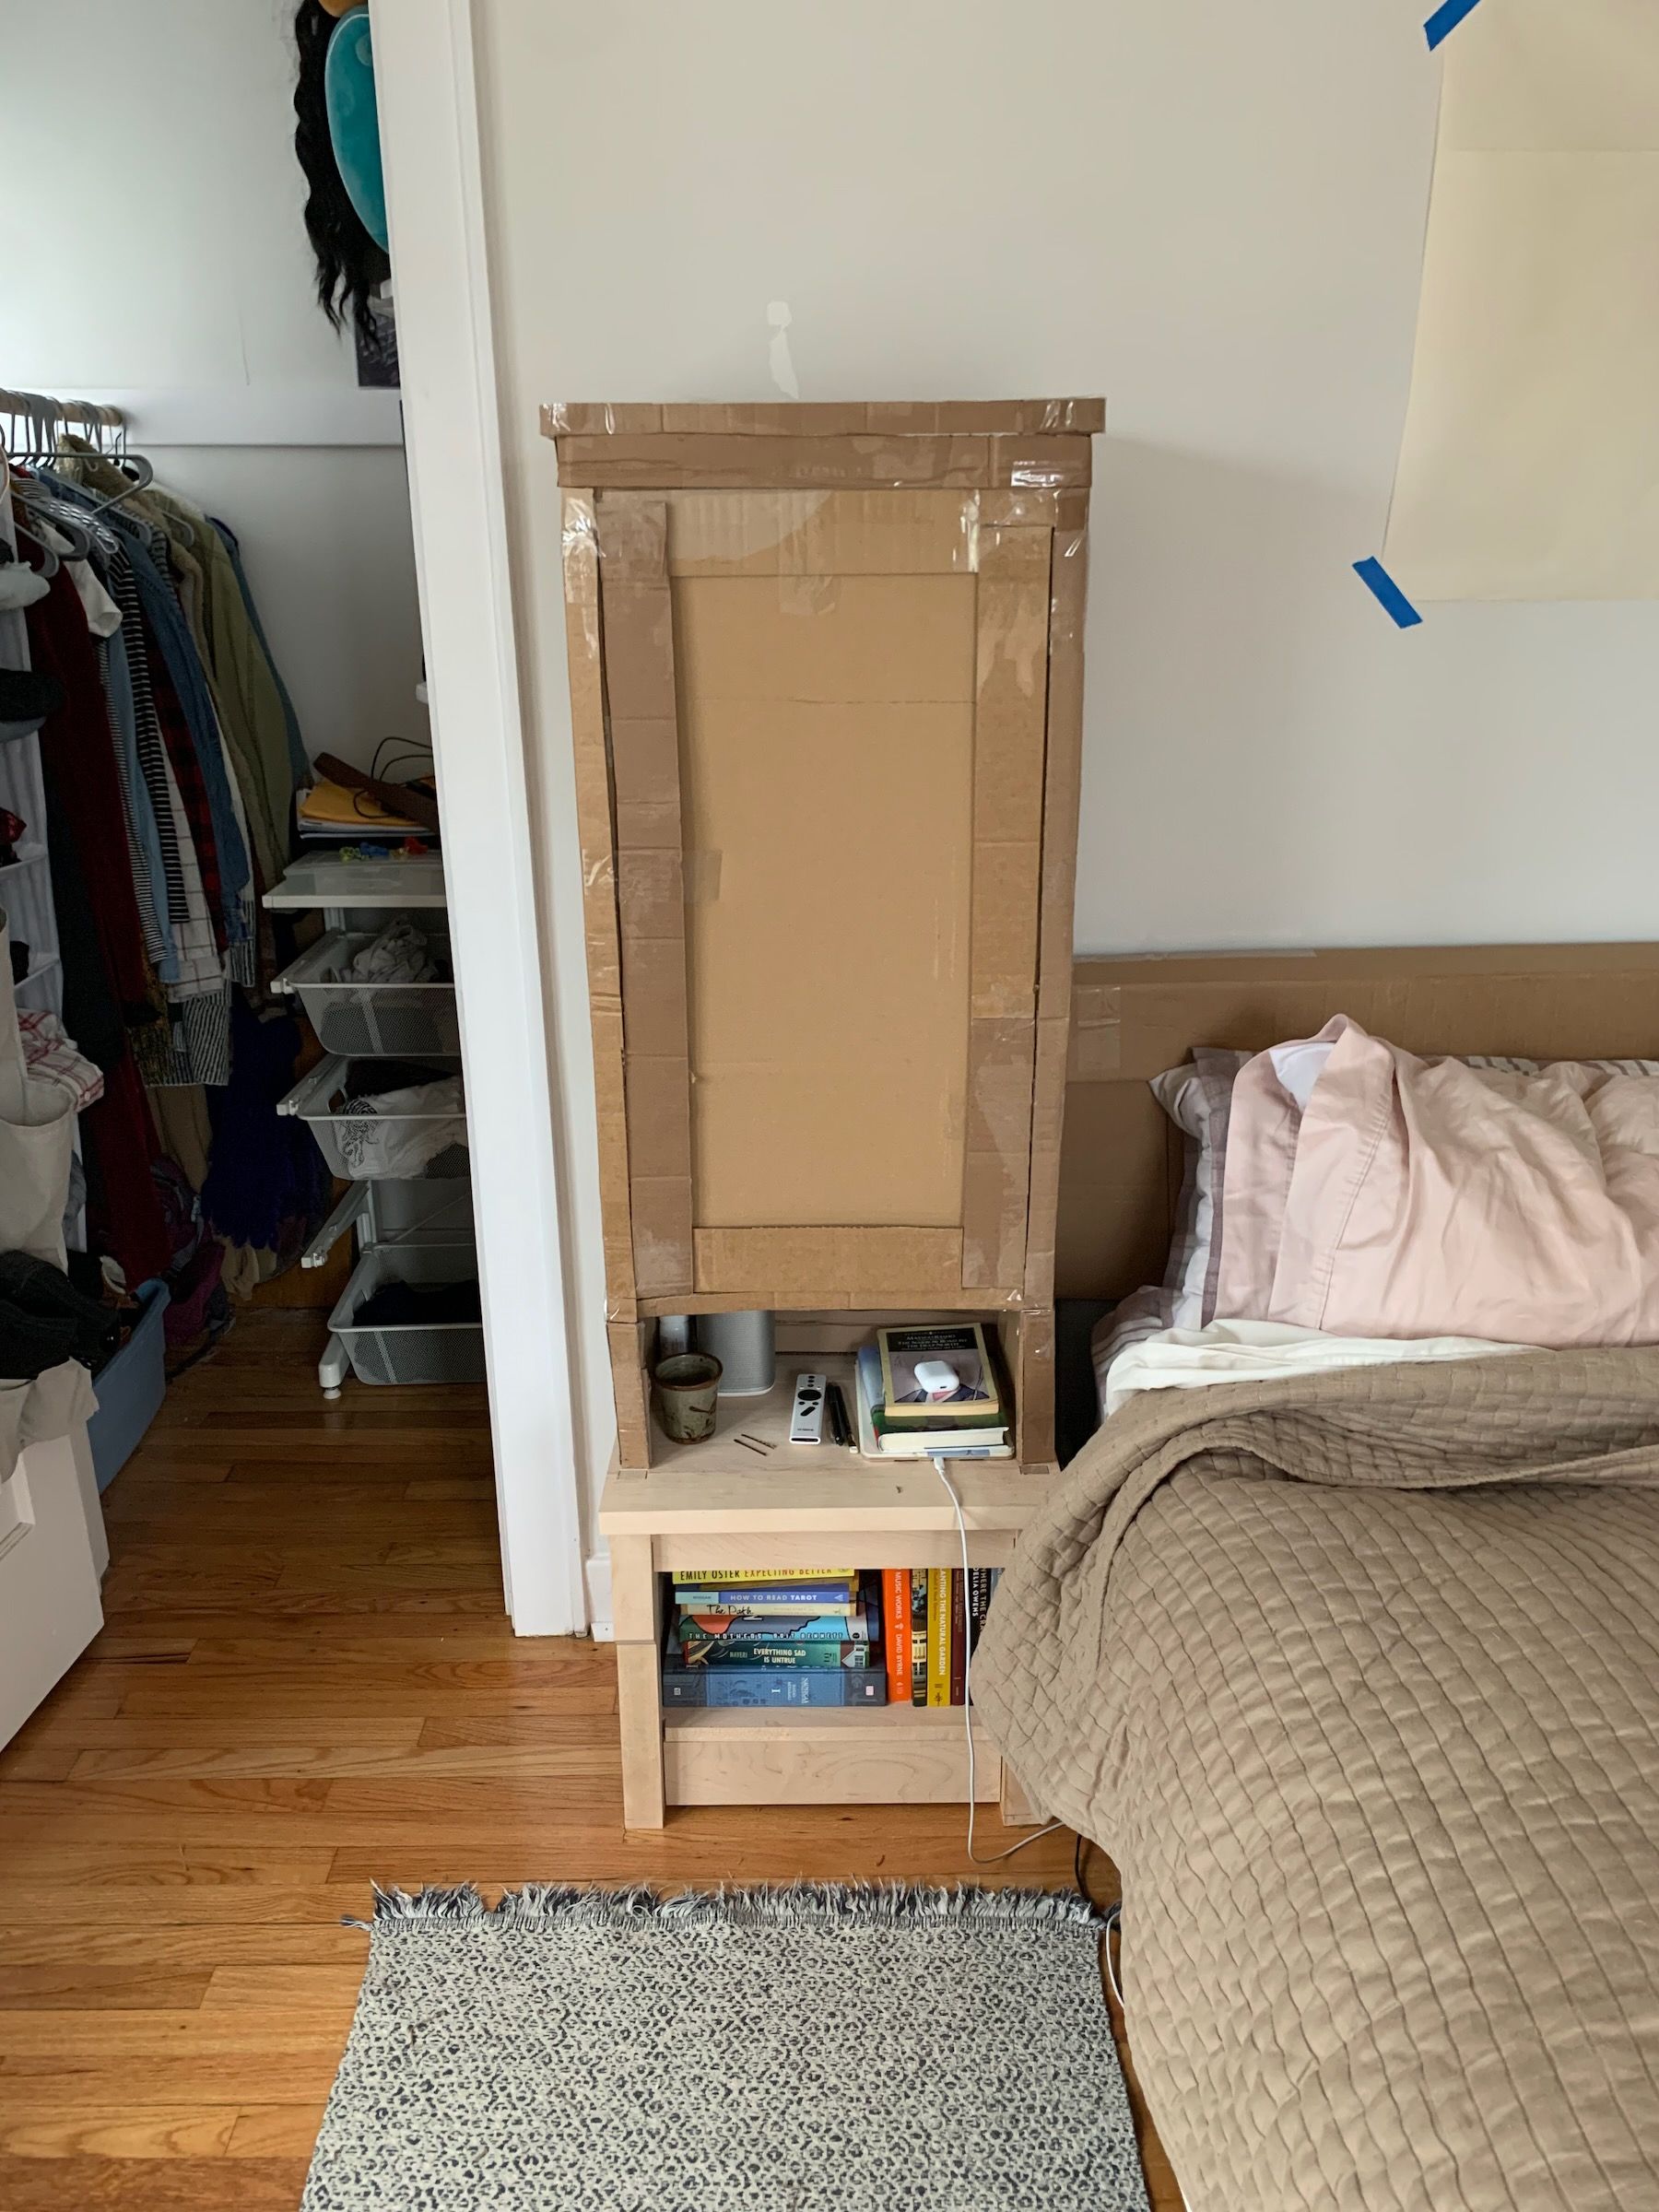
For the purposes of our class presentations, I just stacked the cardboard mockup of the hutch on top of the (mostly) completed wooden base.
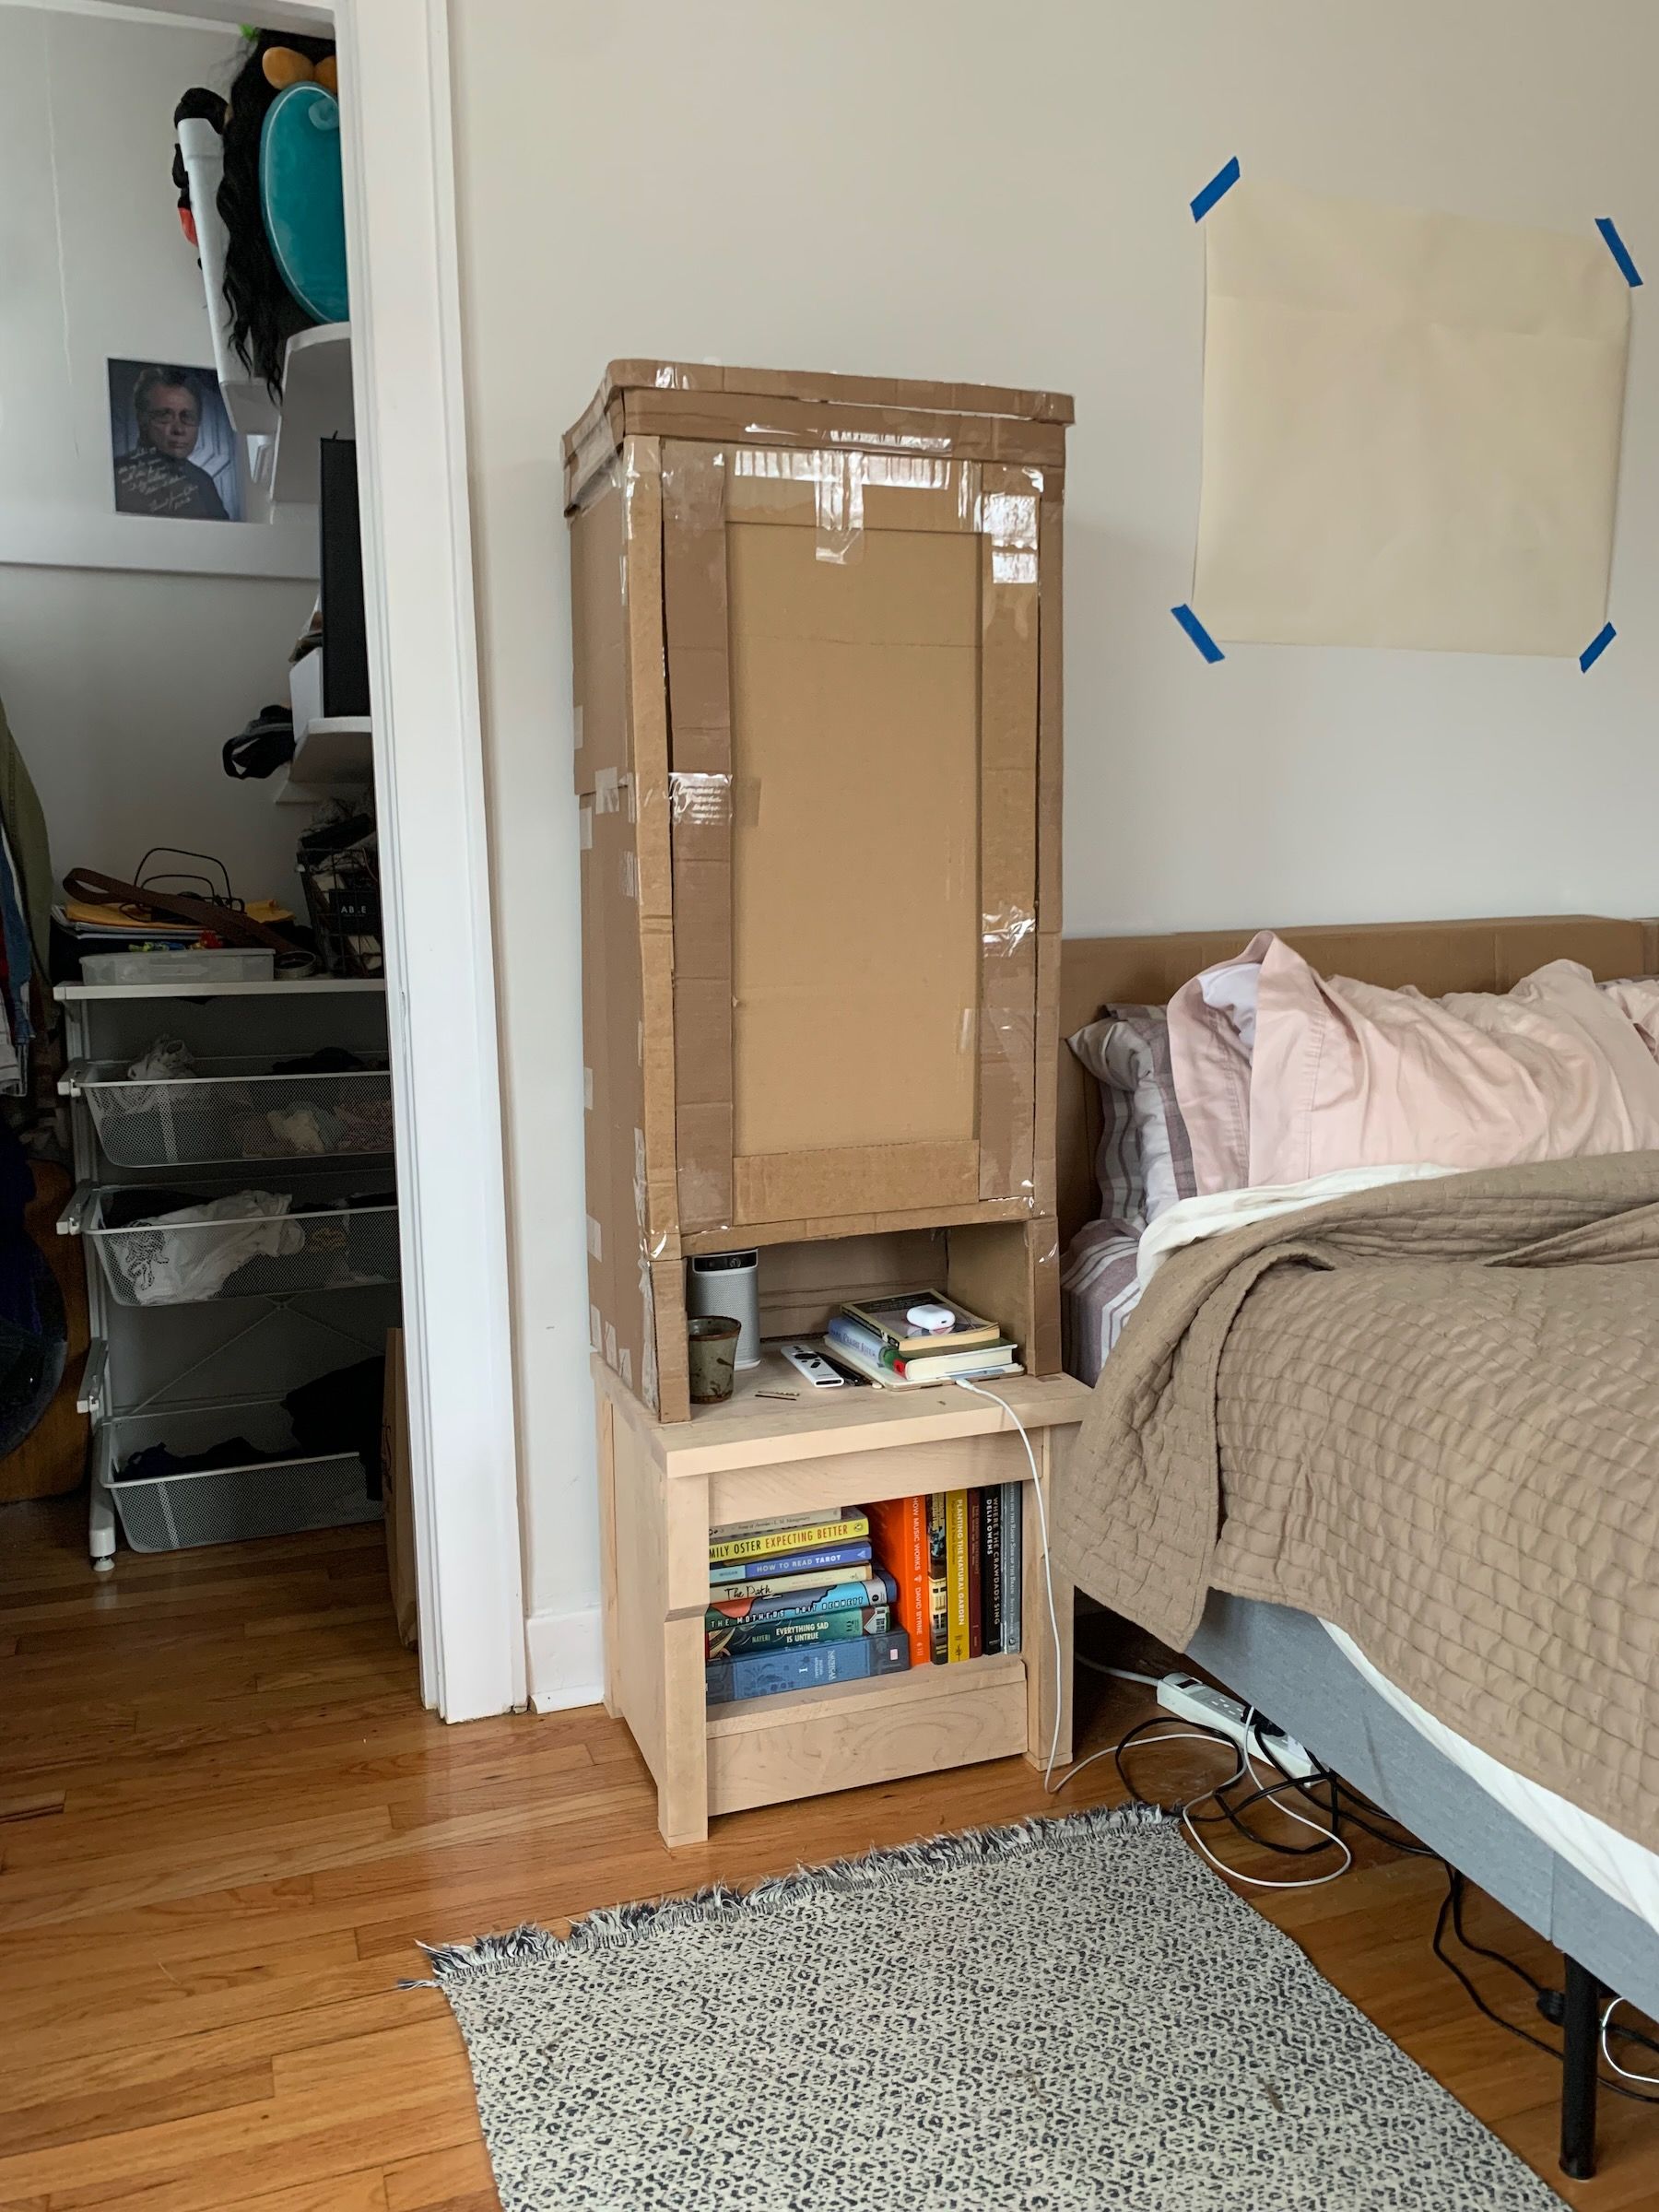
Here’s the joinery detail on the surface, which gives a nice transition from the hutch’s face frame to the tabletop. Was it worth the time? I think it was.
6. Lessons and Next Steps
Like the Ornament Project, I was a bit overambitious with timing. I’m going to build the hutch, figure out what kind of finish I want for the cabinet, and look for ways to further strengthen the unit’s feeling with some kind of detail or ornament. Then I’ll build a second unit for the other side of the bed, and turn my attention after that to the connecting headboard (which will need similar mockup refinements first, I think). And maybe some kind of footboard? We’ll see.
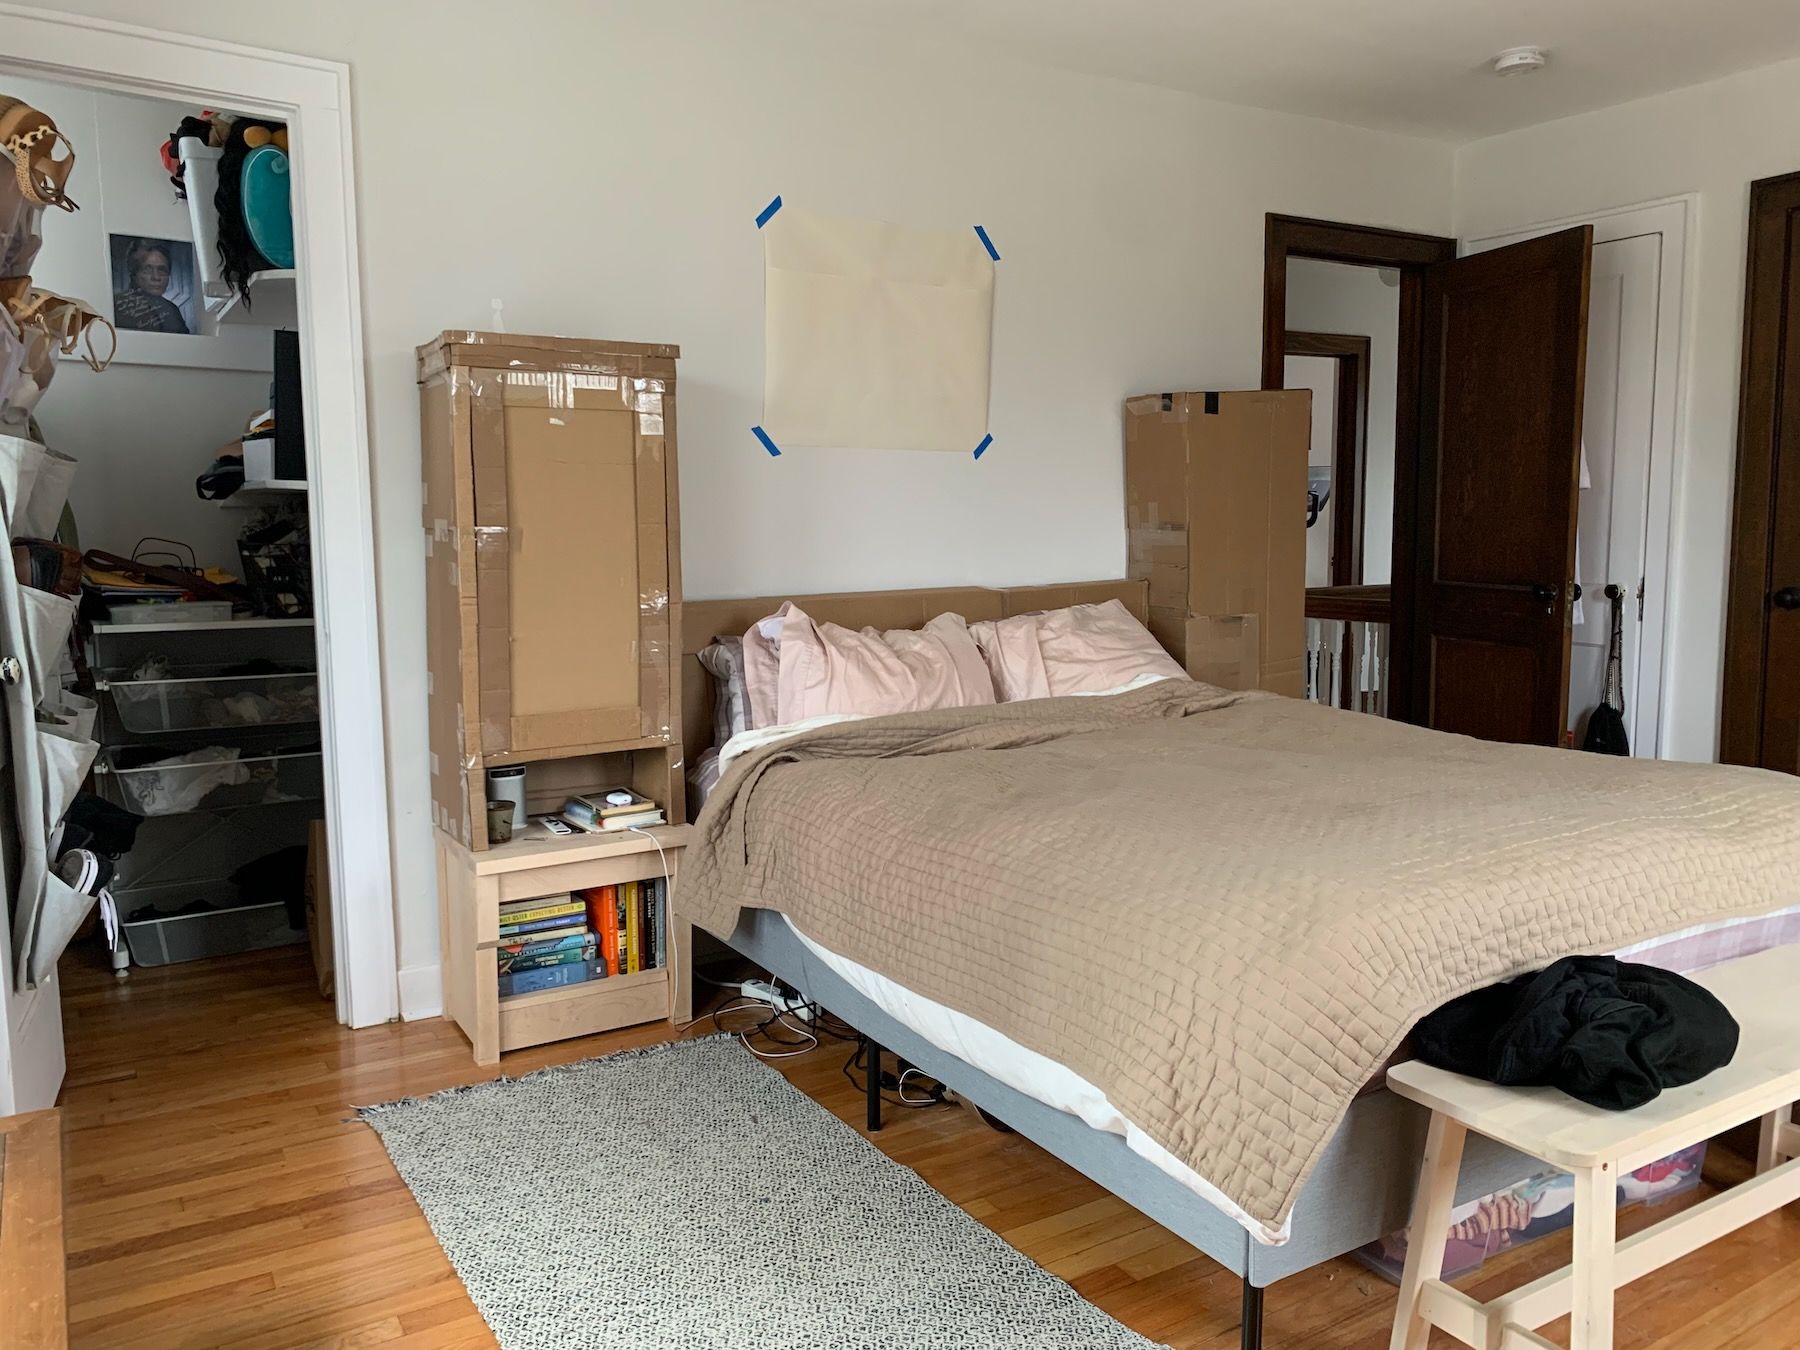
Even in its current, part-cardboard state, this has been a huge improvement to the feel of the room. We’ve left the cardboard in place for weeks now, however crude, because it’s better than nothing.
I learned so many technical woodworking skills with this project, from cutting mortises and tenons to glueing and jointing narrower boards to make wider ones. I had a crash-course also in hand planes and chisel-sharpening, thanks to YouTube. I was in a constant state of overwhelm. There were times I was worried I was trying to learn too many new things with a single project, and I might have been.
But the most important lesson by far was: Full-scale. Cardboard. Mockups. Having a real-sized thing in cardboard gives you all sorts of information that you wouldn’t get from a drawing or model – especially when that mockup is placed in context. Cardboard’s (I just used leftover boxes we had lying around) quicker and easier to change than wood, and these prototypes are also great for getting feedback from other people – in this case my partner. It’s hard to believe that people build furniture without mocking it up like this first, but it happens all the time. Don’t let it happen to you!
Here’s the requisite before-and-after:
Our next project is even greater in scale: designing a (small) dream house. Though, we won’t be building any of it, so maybe I can find some spare time to finish these cabinets.